Cloud Backup is a BackupAssist add-on that allows you to back up data to Microsoft Azure Blob Storage, Amazon S3, S3 Compatible cloud storage or WebDAV enabled cloud storage. Cloud Backup is a best practice cyber-resilience solution and is our recommended backup type for all servers.
How to perform a cloud backup to Microsoft Azure
How to perform a cloud backup to Amazon AWS
Cloud backups provide convenient backup destinations with the following advantages:
- Scalability – your storage will scale with your needs and the total storage available can be increased by updating your subscription package.
- Affordability – you do not need to purchase or maintain storage devices or storage servers.
- Security – your data is encrypted to prevent unauthorized access to your backups.
- Availability – cloud computing uses data centers that have a better level of availability than could be achieved with your own local servers.
- Efficiency – Cloud Backup uses deduplication and compression to reduce the amount of data that needs to be transferred to the cloud each time a backup runs.
Cloud Backup backs up files in chunks and keeps track of what files have been sent to the cloud destination. This means if the backup jobs stops or is interrupted, for example due to a network or internet outage, the backup job can resume and does not need to restart.
If a problem interrupts the backup job, BackupAssist will try several times to continue backing up, and if this does not work, it will try the next chunk to be backed up in case the problem is with specific chunks of data.
Resume Cloud Backup outcomes:
- If the backup job can resume, it will complete the backup.
- If the backup job cannot resume, it will not create a backup and the job will fail.
- If the backup job can resume after skipping data chunks that could not be backed up, the backup job will continue without those files and add a warning to the backup report to advise what files were not backed up.
Note: If you manually cancel a Cloud Backup job in BackupAssist, the next time that job runs (either manually or scheduled), the backup job will resume from the point at which it was canceled.
Below is a list of the most common questions asked about BackupAssist 10 Cloud Backup.
Click on the question to view the answer.
The following restore and recovery options are supported:
- Local and Network Files
- Files inside Hyper-V Guests
- Exchange Server (entire databases)
- Exchange Granular Restore (.edb)
- SQL Server (entire databases)
- Full VM Recovery (from the Recovery tab)
Cloud backup does NOT support:
- Rapid VM Recovery
- Bare-metal backup and recovery
- SQL point-in-time
All data is encrypted on the local machine that BackupAssist is installed on prior to it being transferred over a secure connection to the cloud provider you’ve chosen as your destination. Because this is BackupAssist's own encryption, the cloud provider cannot access the backup, or even see what data you backed up. In addition to this, the cloud service provider will apply its own encryption to the cloud container to further protect the backup.
In addition to this, your files are also password protected and there is no way to access your data without this password. It is recommended you do not share this password.
Warning: We also recommend that you store a copy of your password somewhere secure, as BackupAssist Technical Support cannot recover lost passwords.
If you use the cloud provider's portal, or another tool, to look inside the backup container (Azure) or bucket (AWS), you will see:
- File CRYPT – this file is a critical component in securing your backups.
- File ROOT – this is the entry point allowing BackupAssist to find the backups in the container.
- Directory chunks – this is where all of the backup data is located.

Yes, all the data that you back up is deduplicated and also compressed.
To learn more, see our deduplication article.
Nothing. Making any changes to the contents of the Cloud Backup's container could cause your backups to be corrupted and unusable in a restore scenario.
Warning: The data inside a container is NOT intended to be used directly by users, and is not human-readable. BackupAssist tools must be used to restore or recover from Cloud Backups
BackupAssist automatically removes data that is no longer needed (from old backups) from the provider, to reduce storage costs.
The process does not yet support concurrent backups or concurrent backup and restore, meaning that if you try to have more than one backup running to a container then one or both backups may become corrupted.
Note: In future, BackupAssist will support the re-use of containers, but for now it is important that a single container be dedicated to a single job on a single BackupAssist installation.
Cloud Backup is designed to make full use of the available bandwidth, and we have seen utilization exceeding 20Mbps.
Cloud Backup uses deduplication and compression to give effective speeds that are even greater. We have seen a Hyper-V VM that contained over 100GB in VHD files take only 4 hours to complete. This is effectively more than 50Mbps.
Note: As always, actual throughput will vary depending on network setup, current network utilization, machine loading, etc.
Cloud Backup has been designed to be extensible. For initial release Azure and AWS providers are supported.
Please email support@backupassist.com if you have a cloud provider with a block or object level storage facility that you would like to have supported.
No, Amazon Glacier is not currently supported.
No, CSV is not currently supported for Cloud Backup.
To back up guests on a CSV, use System Protection, File Protection, File Archiving.
To learn more, see Hyper-V in a CSV environment
Cloud containers are managed by the cloud service providers, Amazon Web Services and Microsoft Azure. We do not currently have the ability to manage how the container is managed, as this is controlled by the providers own consoles and features. However, we are investigating what options we have to restrict the size of Cloud Backups.
It is worth noting that you can use BackupAssist to set how many backups are kept in the cloud destination using Cloud Backup’s Schedule options. There are two schemes available: The Grandfather-Father-Son scheme keeps 23 backups but the Basic scheme stores just 1 backup for each day of the week, so a maximum of 7.
When you create a Cloud Backup job, you can seed the data to the cloud destination if there is too much data to send across the internet in the first full backup. Seeding involves putting the data on a removable drive and sending it to your cloud provider so they can copy the data to your cloud container. Your backup job will then detect the data in the container the first time it runs, and only back up data that has changed.
When to seed
You should consider seeding if the time required to back up all the data on a Cloud Backup's first run would be too long and impact other processes. This will depend on the amount data you have selected and the performance of your connection. For example, if the backup will take more than a day, it may impact your network during business hours and prevent scheduled backups from running, so seeding would be a viable option.
Seeding with BackupAssist
BackupAssist has a Seeding Tool, which prepares the drive that you send to your cloud provider by copying to data to the drive in the correct format. The process from that point on is defined by your cloud provider.
This means there are two processes to follow:
Process 1 - follow the steps in the BackupAssist seeding guide.
Process 2 - follow the steps in your AWS, Azure or WebDAV cloud provider's guide.
Creating cloud storage
Before you can run a Cloud Backup job, you need to have a cloud destination set up. The following sections explain how to create cloud storage for Amazon S3, Microsoft Azure, S3 compatible providers and devices, and WebDAV compatible providers and devices.
To create Azure cloud storage, go to https://azure.microsoft.com/ and create an Azure account and a storage account. The Cloud Backup job will create a container (called a blob) inside this storage account for the backup job to use.
Creating a storage account

- Log into your Azure account and go to the Portal, if you are on the default home page.
- Select + New from the top left.
- Select the Storage Account option next to the green icon.
- Enter the storage account details in the fields provided. The existing selections are defaults and the options selected can effect the cost. For Account kind enter Blob storage. Once the Resource group has been create, it will appear in your list of resources after you refresh the UI.
You can have multiple storage accounts in your Azure account.
When backing up to a Microsoft Azure container, a connection string is used by the backup job to access the storage account. The connection string is entered in the Set up destination step when creating the backup job.

To locate the connection string:
- Log into the Azure portal.
- Select the Storage account from the Resources list.
- Select Access keys from the list of Settings.
- Using the copy button, select a Connection string from one of the key sections. E.g. under Key1.
- Paste the connection string into the field provided.
The dashboard will display the Keys and Connection strings for the selected storage account.
To learn more, see the Microsoft documentation, About Azure storage accounts.
Warning: We recommended letting BackupAssist manage the space in the cloud backup container. This means not enabling (or turn off ) any space management or life-cycle tasks on your cloud backup containers. Leaving these tasks enabled will lead to parts of the backup’s data being permanently deleted, and result in the backups being incomplete and unusable in a recovery situation.
To create Amazon S3 cloud storage, go to https://aws.amazon.com/ and create an AWS account and an IAM (identity access management) account. The Cloud Backup job will create a container (called a bucket) for the backup job to use.
Creating an IAM account

- Log into the AWS web console.
- Select Services.
- Select IAM from the Security, Identity & Compliance.
- Select Users from the right menu.
- Select Add user.
- Fill in the fields using the AWS documentation for guidance.
- When prompted, select the Programmatic access AWS access type.
- When defining access on the Set permissions page, the IAM user account will need sufficient access for the backup job to change data at the cloud storage destination. You can give the account the PowerUserAccess policy, or create you own custom policy with more restricted access.
- When you create the account, an Access Key ID and Secret Access Key will be created. In this step, select the Download csv link to download a csv file containing the access keys. You will need to enter these keys when you create the backup job. Do not lose this csv file and keep it in a safe place.
You can create multiple IAM accounts within your Amazon AWS account, and use different IAM accounts for different backup jobs.To learn more, see the Amazon documentation, Creating an IAM User in Your AWS Account.
The Access Key ID and Secret Access Key are downloaded to a csv file when you create the IAM user account that the back job will use. Open this csv file when you create the backup job.
To learn more, see the Amazon guide here
Warning: We recommended letting BackupAssist manage the space in the cloud backup container. This means not enabling (or turn off ) any space management or life-cycle tasks on your cloud backup containers. Leaving these tasks enabled will lead to parts of the backup’s data being permanently deleted, and result in the backups being incomplete and unusable in a recovery situation.
An S3-compatible destination can be set up as a private cloud using server software like MinIO, or you can use a 3rd party cloud storage service like Wasabi. The server software or 3rd party service is used to create your cloud storage, and the settings used in BackupAssist are the same as those used for Amazon S3, except you will have an endpoint URL instead of a region.
To learn more about the options available, see the following resources:
- Wasabi storage guide
- Using BackupAssist with QNAP NAS and Zenko
- Using BackupAssist with a Synology NAS & MinIO
- Using BackupAssist with Windows & MinIO
Warning: We recommended letting BackupAssist manage the space in the cloud backup container. This means not enabling (or turn off ) any space management or life-cycle tasks on your cloud backup containers. Leaving these tasks enabled will lead to parts of the backup’s data being permanently deleted, and result in the backups being incomplete and unusable in a recovery situation.
WebDAV is an extension of the HTTP protocol that allows clients to perform remote web content authoring operations. For backups, this means it can be used to transfer data from BackupAssist to a cloud destination that has WebDAV enabled. WebDAV is supported by some cloud storage providers who enable it on their web servers. If you select a provider that supports WebDAV, follow the steps on their website to create an account.
Not all cloud providers will support WebDAV, so it's important to research your cloud provider and their requirements before committing to their cloud storage service.
Private clouds can also be set up by installing a remote server with WebDAV support. In this case, there is no cloud provider account, as you operate the server yourself. To learn more, see Private Cloud destinations.
Warning: We recommended letting BackupAssist manage the space in the cloud backup container. This means not enabling (or turn off ) any space management or life-cycle tasks on your cloud backup containers. Leaving these tasks enabled will lead to parts of the backup’s data being permanently deleted, and result in the backups being incomplete and unusable in a recovery situation.
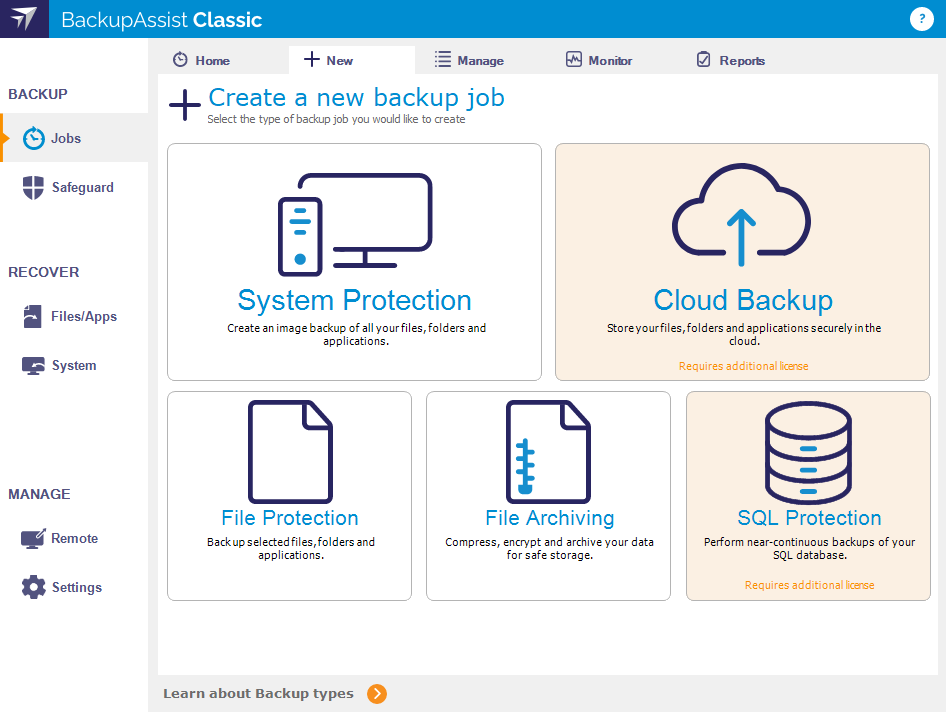
Creating a cloud backup job
The following steps explain how to create a backup job that will back up your data to a cloud destination. You can also watch our video tutorials that are linked at the top of this page under the Show : Cloud backup tutorial videos drop down.
Launch BackupAssist and follow the steps outlined below:
- Select the Jobs tab
- Select Home.
- Select Create a New Backup Job.
- Select Cloud Backup.
- Selections.
- Destination media.
- Select Amazon S3, Microsoft Azure Blob Storage, S3-compatible cloud storage or WebDAV.
- Click Next.
- Schedule.
- Basic – a daily backup from Monday to Friday. Each day, the backup will write over the previous week’s backup for that day.
- Grandfather-father-son – daily backups with weekly, monthly and annual archive backups. The weekly backups are retained for a month and the monthly backups for a year.
- Select a scheme.
- Select the time you would like the backup job to run.
- Select Next..
- Set up destination.
- Amazon S3 bucket
- Amazon S3 Region
- Access Key ID & Secret Access Key
- Encryption Password
- Check destination
- Container
- Connection string
- Encryption Password
- Check destination
- S3 Compatible bucket
- Service Url
- Ignore SSL warnings
- Access Key ID & Secret Access Key
- Encryption Password
- Check destination
- Backup Container
- Server URL
- Ignore SSL warnings
- User Name
- Password
- Encryption Password
- Check destination
- Notifications
- Select Add an email report notification.
- Enter recipients into the Send reports to this email address field.
- Enter recipients into the Also send reports to this email address field. You can then use the drop down list to select the condition under which the email is sent.
- If you want to know when a backup media has been changed, select Add an email reminder notification and enter the email addresses to send the notifications to.
- Click Next.
- Name your backup.
- Next Steps.
If this is the first time you have created a backup job, you will be asked to provide a Backup User Identity. To learn more, see Backup user identity. To throttle the bandwidth used by Cloud Backup, see Cloud Backup settings
This step is used to select the data and applications that you want to back up. Any VSS applications detected will be displayed here as application directory containers.

Select the volumes, folders, files and applications that you want to back up, and click Next.
Use this step to select the cloud destination that you want to back your data up to. This step’s name will change to the cloud service selected.

Follow these steps to pick your cloud backup destination:
WebDAV can be used to back up to either a cloud provider that supports WebDAV, or to your own private cloud using WebDAV . To lean more, see Private Cloud destinations
This step is used to select when and how you would like the backup job to run, and how long you would like the backup to be retained for. A selection of pre-configured schedules, called schemes, can be selected.

There are two schemes to choose from:
To set up the schedule:
To learn more, see Backup Schedules
This step configures the cloud backup destination selected in step 5. There are different settings for Amazon S3, Microsoft Azure and WebDAV destinations.
Warning: We recommended letting BackupAssist manage the space in the cloud backup container. This means not enabling (or turn off ) any space management or life-cycle tasks on your cloud backup containers. Leaving these tasks enabled will lead to parts of the backup’s data being permanently deleted, and result in the backups being incomplete and unusable in a recovery situation.
Amazon S3 Bucket settings
Fill in the S3 Bucket settings including the bucket name, and your Access Key ID and Secret Access Key.
 l
l
Enter a name for your S3 bucket. BackupAssist will use this name to create the bucket. Provide a different name for each job, because a different bucket must be used by each backup job. This name must follow the conventions explained in Amazon's naming guide.
Select the region for the data center where you want your cloud storage to be based.
Note: Seeding is only supported for us-east-1, us-west-1, us-west-2, eu-west-1, ap-southeast-1. To learn more see Amazon S3 seeding
For this step, you will need to open the csv file that you saved when you created the IAM user account that this job will use. This csv file contains the Access Key ID and Secret Access key.
Copy these keys from the csv file to the fields provided.
Note: If you plan to seed your backup, you will need these keys for the seeding process, so you will need to record the Secret Access Key for later use because the secret access key can only be retrieved when it is created.
Cloud Backup uses encryption to protect your data. Enter and confirm an encryption password. This password will be needed if you perform a restore.
Note: It is important that you keep a copy of your password in a safe place, as we cannot retrieve passwords if they are lost or forgotten.
Select the Check destination button. This important step uses the information provided to test the connection to the cloud destination, and then creates the cloud container that the backup job will use.
Azure container settings
Fill in the Azure container settings including the container name and connection string.

Enter a name for your Azure container. BackupAssist will use this name to create the container. Provide a different name for each job, as a different container must be used by each backup job. This name must follow the conventions explained in the "Container Names" section in Microsoft's naming guide.
Log into the Azure portal and, select the Storage account from the Resources list and select Access keys from the list of Settings. Under each key will be a Connection string. Use the copy button to select a Connection string from one of the key sections and Paste it into the field provided on BackupAssist's Set up destination screen.
To learn more, see the Set up your cloud account section above or the Azure website.
Cloud Backup uses encryption to protect your data. Enter and confirm an encryption password. This password will be needed if you perform a restore.
Note: It is important that you keep a copy of your password in a safe place, as we cannot retrieve passwords if they are lost or forgotten.
Select the Check destination button. This important step uses the information provided to test the connection to the cloud destination, and then creates the cloud container (bucket) that the backup job will use.
If you select Storage accounts from main menu and then name of the account you used, and then select Blobs on the right pane, you will see a blob inside the Storage account with the container name you specified.
S3 Compatible Bucket settings
Fill in the S3 Compatible Bucket settings including the bucket name, and your Access Key ID and Secret Access Key.
 l
l
Enter a name for your S3 bucket. BackupAssist will use this name to create the bucket. Provide a different name for each job because each job will use its own bucket. This name needs to be unique and can only use lower-case characters, numbers, periods and dashes.
This is the URL endpoint that BackupAssist will use to access the cloud storage. If you are using an S3-compatible service provider, the URL will be available from your provider and may be region-specific. If you set up your own S3-compatible storage, you may have configured this URL when creating the storage, or you may need to refer to the product documentation.
Select this option if you are using an https URL for a private cloud destination with self-signed certificates, rather than a trusted certificate. For example, when using a NAS device, this option will allow you to back up to the device in spite of any SSL errors.
Note: This option is not intended for use with public cloud provider destinations.
Enter the keys for the IAM account that you want BackupAssist to use for this job. Please refer to the relevant service provider's documentation or the S3 server software to extract these keys.
Cloud Backup uses encryption to protect your data. Enter and confirm an encryption password. This password will be needed if you perform a restore.
Note: It is important that you keep a copy of your password in a safe place, as we cannot retrieve passwords if they are lost or forgotten.
Select the Check destination button. This important step uses the information provided to test the connection to the cloud destination, and then creates the cloud container that the backup job will use.
WebDAV container settings
Fill in the WebDAV container settings using information from either your cloud provider or private cloud solution.

Enter a name for BackupAssist to use when it creates the destination container for your backup job. The name can only be made of lower case letters and numbers. No capital letters, spaces or special characters are allowed.
Enter the URL used by your cloud provider for your WebDAV cloud storage account. If you have a private cloud, this URL will be set up in your destination's internet server.
Select this option if you are using an https URL for a private cloud destination with self-signed certificates, rather than a trusted certificate. For example, when using a NAS device, this option will allow you to back up to the device in spite of any SSL errors.
Note: This option is not intended for use with public cloud provider destinations.
Enter the user name that you have been given for your cloud storage.
Enter the password that you set up for your cloud storage username.
Cloud Backup uses encryption to protect your data. Enter and confirm an encryption password. This password will be needed if you perform a restore.
Note: It is important that you keep a copy of your password in a safe place, as we cannot retrieve passwords if they are lost or forgotten.
Select the Check destination button. This important step uses the information provided to test the connection to the cloud destination, and then creates the destination folder that the backup job will use.
Once a backup job has completed, BackupAssist can send an email to inform selected recipients of the result. This email notification is enabled during the creation of the backup job, but you must also provide your mail server settings so that the notifications can be sent. To learn how to configure your mail server for BackupAssist, see Email server settings.
To enable email notifications:
To learn more, see Manage : Notifications
Note: After the backup job has been created, you can modify the notification's recipients, set additional notification conditions and include print and file notification types. To learn more, see Email address list
Provide a name for your backup job, and click Finish.
This step explains the seed backup option that is available if you think there is too much data for the first full backup across the internet. Seeding should only be considered after understanding what seeding involves as it requires following detailed process managed by your cloud provider and there will be costs involved. To learn more, see Cloud Seeding
Cloud Backup restores
Perform a restore from a Cloud Backup as you would for any other backup type. Simply select the Files/Apps tab Home menu, select the required restore option and follow the steps. To learn more, see Files / Apps tab
When performing a restore from a Cloud Backup, you will be prompted to enter the password used to encrypt the backup when you select the Restore button.
What's next
- To learn about monitoring backup jobs, see Monitor backups
- To learn about the other backup settings available, see Settings tab
- To learn about the options available when you edit a backup job, see Manage backup jobs