System Protection, Cloud Backup, File Protection and File Archiving can be used to back up an Exchange Server while it is running. These backups can be used to restore an Exchange Server, storage groups or individual mail items using the Exchange Granular add-on.
System Protection is our recommended backup type, as a bare-metal backup can be used to perform a full system recovery. This Exchange Server backup guide uses System Protection.
Exchange Backup type
Restoring Exchange databases from a backup is a straight forward process. However, complications can arise when you restore Exchange databases into a new Exchange Server, try to restore the entire Exchange Server application or want to migrate your Exchange Server to new hardware. For this reason it is easier and safer to perform a recovery of the full Exchange Server rather than just restoring the Exchange Server application.
For this reason we recommend using Advanced Protection System to create full backups of your Exchange Server. To learn more see Exchange Server restore and System Recovery
Exchange Server VSS backups
For BackupAssist to use the Exchange VSS writer it needs to be installed on the Exchange Server.
Exchange Servers are backed up while they are running and while data is changing. For this reason, VSS is used to maintain a crash-consistent copy of the Exchange data while it is being backed up. This ensures that the backup represents the Exchange database at a single point in time – the time the backup job started. VSS does this by maintaining a snapshot of the Exchange Server’s data, which the backup job uses if it needs to backup data that has changed since the backup job started.
In addition to the consistency provided by VSS, the Exchange Server has a VSS Writer that checks its own files in the VSS snapshot to make sure they are correct, and that information in memory and uncompleted database transactions are included in the snapshot. By doing this, the Exchange Server makes sure that the data being backed up is not just crash-consistent, but that it’s application-consistent.
If you only backup the Exchange EDB file, Exchange will not be aware of the backup and will not use the VSS Writer, so your backup will not be application-consistent. It will only be crash–consistent.
Note: To create an application-consistent backup, the Exchange VSS Writer must be used. For Exchange to use its VSS Writer, the full Exchange Server or the full storage group must be selected and backed up. For this reason, you should never backup just the EDB database file.
Why are application-consistent backups important?
Crash-consistent is okay if all you need is files from the same point in time, but for a database this is not enough. Data and logs are constantly changing so the backup must be application-consistent.
Imagine a transaction where data in a database is moved from location A to location B. If the first process, “removing the data from location A” is captured by the backup job but the process “adding the data to location B” is not (completely) captured by the backup job, then you can have a consistency problem in the backup of your database. This could happen because the process of adding data to the other location was still being written or in memory, and therefore not captured by the backup job.
The result is a backup of a database where data was removed from one location but not added to the other. When you go to do the restore, the data may not be there, or it may be incomplete or corrupt. Only Exchange can verify changes to its database while transactions are taking place, therefore an application-consistent backup is required by Exchange Granular Restore.
Note: BackupAssist does not support Exchange Granular Restores from backups that are not application-consistent.
To learn more VSS, see VSS guide
Exchange Server restores
Most Exchange restores will be for end users who have lost or deleted emails or mail items (like contacts or appointments). However, there may be times when you need to restore a full Exchange database, known as a Storage Group or Information Store.
To learn more about restoring individual mail items, see Exchange Granular Restore
To learn more about restoring a storage group or the full Exchange Server application, see Exchange Server restore
Exchange Server recoveries
Your Exchange Server backup plan should include bare-metal backups that can be used to recover the Exchange Server if the server’s hardware is lost or damaged. These backups include not just the Exchange Server but the volume it is installed on and the Windows Server operating system. BackupAssist System Protection backups can make backups of Exchange Servers that can be used to perform full system recovery.
To learn more about performing a recovery, see Recover System tab
How to enable the Exchange VSS writer
When you back up an Exchange Server using VSS, the Exchange VSS writer will work to improve the shadow copy and make it application consistent. If the Exchange VSS writer is not enabled, you will not have an application consistent shadow copy, and your backup job may encounter errors.
The Exchange VSS writer has to be manually enabled for Microsoft Exchange 2007. This should be done before running a VSS backup of your Exchange Server using BackupAssist.Enabling the VSS writer requires manual changes to the registry. Before you modify the registry, make sure you back it up and that you understand how to restore the registry if a problem occurs.
You can check if the Exchange VSS writer service is running by opening a command prompt and typing vssadmin list writers.
Warning: If you use Registry Editor incorrectly, you may cause serious problems that may require you to re-install your operating system. Microsoft cannot guarantee that you can solve problems that result from using Registry Editor incorrectly. Use Registry Editor at your own risk.
To Enable the Exchange VSS writer, follow these steps:
- Log onto your Exchange Server.
- Select Start > Run.
- Type regedit into the Open field.
- Select OK.
- Locate and open the registry key: HKEY_LOCAL_MACHINE\SYSTEM\CurrentControlSet\Services\MSExchangeIS\ParametersSystem.
- Look for the Disable Exchange Writer value.
- If this value has a DWORD of 1, then change it to 0.
- Click OK.
- Close the Registry Editor.
- Select Start > Administrative Tools.
- Select Services.
- Stop and then start the Microsoft Exchange Information Store service.
This will open the Registry editor. You can locate items in the registry by using the search and browse functions.
You can now backup your Exchange Server using its VSS writer.
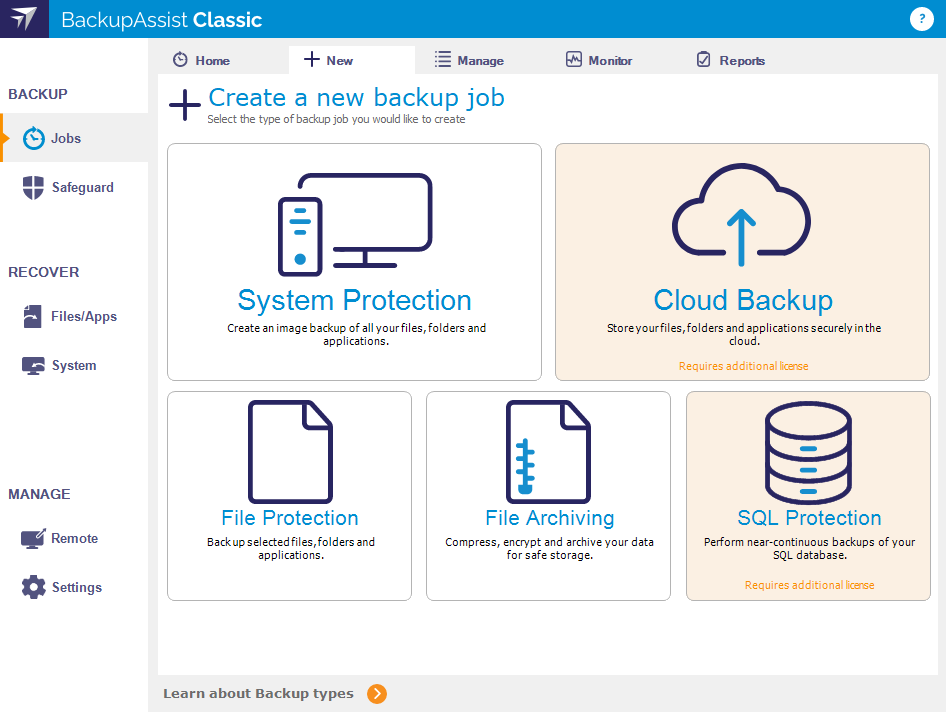
How to create an Exchange Server backup job
Launch BackupAssist and follow the steps outlined below:
- Select the Jobs tab.
- Select Home.
- Select Create a New Backup Job.
- Select System Protection, File Protection or File Archiving.
- Selections.
- Destination media.
This step is used to select the type of media that you want to back your data up to. This step’s name will change to the media type selected, when you click Next. - Select a media for your backup destination.
- Select Enable BitLocker encryption if you want to encrypt your backup. BitLocker encryption is available on supported Windows Servers that have BitLocker installed for External disk and RDX drive destinations. To learn more, see BitLocker Encryption guide
- Select Data container, if you want to use a VHD / VHDX as your backup destination. Before you select Data container, review the resource Data Container guide. This explains why you would use a Data container, and what the advantages and requirements are.
- Click Next.
- Schedule.
This step is used to select when and how you want the backup job to run, and how long you would like the backup to be retained for. A selection of pre-configured schedules, called schemes, as well as a custom scheme, can be selected. - The schemes available will depend on the type of destination media selected in step 5.
- Clicking on a scheme will display information about the schedule used.
- Exchange VM Detection.
- The Username and Password of an account that has access to the guest/s running Exchange.
- The Domain of the guest/s running Exchange.
- Set up destination.
This step is used to configure the location of the media selected in step 5. The options presented will change with the type of media selected. - A drive letter of the USB drive used to store the encryption key. An encryption key is saved for each encrypted drive, and is used to unlock the drive when you backup and restore data.
- A password that will allow you to manually access any drive encrypted by this job when you perform a restore or a recovery. This password is saved in the backup job.
- For an RDX or External disk destination, Use all available space will be selected by default. It is important to review this setting to ensure it is appropriate.
- For a Local hard drive and Network location, set the size manually by using the field provided, or select the Use all available space option.
- The size of a Data container cannot be changed once the backup job has run.
- Selecting Use all available space will allow the Data container to grow into the available space.
- Notifications.
Once a backup job has completed, BackupAssist can send an email to inform selected recipients of the result. This email notification is enabled during the creation of the backup job, but you must also provide your mail server settings so that the notifications can be sent. To learn how to configure your mail server for BackupAssist, see Email server settings. - Select Add an email report notification.
- Enter recipients into the Send reports to this email address field.
- Enter recipients into the Also send reports to this email address field. You can then use the drop down list to select the condition under which the email is sent.
- If you want to know when a backup media has been changed, select Add an email reminder notification and enter the email addresses to send the notifications to.
- Click Next.
- Prepare media.
If you selected BitLocker, this step will allow you to prepare the Media for BitLocker and label it. If you are not using BitLocker, but are using external drives, we recommend Editing the backup job once you have created it and using the Prepare Media option to label each drive. - Let BackupAssist keep track of your media. Deselect this if you do not want to prepare and label your media.
- If the wrong media is inserted : Back up anyway and warn the users. This can be changed to Do not back up.
- If new or unrecognized media is inserted : Do not back up. This can be changed to Back up anyway and warn the users.
- Attach the removable drives. If you can only attach one media at a time, repeat the steps for each media.
- Change the label's description if you do not want to use the default description.
- Select the drive designation.
- Select Prepare.
- Name your backup.
Provide a name for your backup job, and click Finish.
If you are using BitLocker encryption, the option will be Next. - Next steps.
This step will be available if you selected Enable BitLocker encryption, so you can encrypt the removable drives. This step will also be available if you are making a backup of the entire system, so that you can make a bootable media.
The following instructions use System Protection to explain the Exchange back up process. If this is the first time you have created a backup job, you will be asked to provide a Backup User Identity. To learn more, see Backup user identity
This step is used to select what you want to back up. Any local Exchange servers will be displayed here as application directory containers.

If your local Exchange Server is not listed in the Selections screen, try restarting Exchange and the VSS service and click the Refresh button in BackupAssist.
There are two selections to choose from:
Back up the Entire System. This option will back up all data, including the Exchange Server, create an image of your system that can be used to perform a full recovery of your computer. Critical Volumes is selected by default and required for a bare-metal backup.
Back up selected items only. This option will allow you to deselect Critical Volume’s and select specific VSS applications and drives. You can select an entire VSS application or choose individual components. To back up your Exchange Server, select the Microsoft Exchange container.
You can select specific data within a drive (e.g. C:) if the backup is to a removable disk. To do this, modify the backup job after you save it using the Manage menu on the Jobs tab.
Make your selections, and click Next.

Follow these steps to select a media:

Schedule considerations:
To learn more, see Backup Schedules
Select an appropriate scheme, and click Next.
If Exchange is running on a Hyper-V guest and being backed up from the host, BackupAssist will added this step so that you can provide BackupAssist with authentication information for that guest. With this information, BackupAssist can see what guest contains the Exchange Server, even if it is on a different domain to the host.
With the guest authentication information, BackupAssist can create a backup catalog of the Exchange Server’s EDB files that the Exchange Granular add-on can use.

If more than one guest has an Exchange Server, then each guest with an Exchange Server should be on the same domain, and accessible using the same account. This account’s username, password and domain is entered in the Exchange VM detection screen.
Enter the following Exchange VM Detection authentication information, and select Next.
Note: A granular restore of Exchange data from a Hyper-V guest, requires both Hyper-V Advanced add-on (which will run automatically as part of the restore) and the Exchange Granular add-on licenses.
BitLocker encryption setup

If you selected BitLocker encryption in step 5, you will need to provide:
Note: A USB flash drive containing the encryption key must connected to the server running BackupAssist, to allow BackupAssist to access the drive when you backup or restore data.
Note: It is important that you keep a copy of your password in a safe place, as we cannot retrieve passwords if they are lost or forgotten.
Data container setup

If you selected Data Container in step 5, you will need to configure the Data container.
Bootable Backup setup
If you are doing a bare-metal backup to an external hard disk, a Bootable Backup Media option will be displayed and selected by default. This feature allows your backup media to boot into a RecoverAssist environment and recover the server, without a separate boot disk.
Destination check report
If you are using a Local media or a Local network destination, a Check destinationbutton will be available to check your backup destination for problems. After the checks have been completed, the results can be viewed by selecting the Report link. If you are using Removable media destinations, these checks are performed when you select Prepare on the Prepare Media step.
Configure your backup destination, and click Next.

To enable email notifications:
To learn more, see Manage : Notifications
Note: After the backup job has been created, you can modify the notification's recipients, set additional notification conditions and include print and file notification types. To learn more, see Email address list

When BitLocker is enabled, these three selections are automatically selected on the Prepare media screen:
The drives listed are based on the backup schedule selected in step 6. Each drive will have a default label name based on your backup schedule, a drive designation drop-down and a Prepare button that is selectable when the media is attached.
To prepare the media:
The drives will be labeled and marked for encryption. Labeling the drive allows BackupAssist to check that it is being used on the correct day. For example, if you attach a USB drive on Tuesday but it is labeled Wednesday, BackupAssist will warn that the incorrect drive was detected. The encryption process will be initiated by the final backup job creation step. To learn more, see BitLocker Encryption guide.
Destination check report
Once the prepare process has completed, a Report link will appear next to the Prepare button. This link opens the Destination Check report, which will advise if any problems were detected with the backup media. For System Protection backups, if the Make media bootable with RecoverAssist was selected in the Set up destination screen, the report will also advise if the media can or cannot be made bootable.
Once all of the media have been prepared, select Next.

Launch RecoverAssist builder
If this box is ticket, the RecoverAssist builder will open when you select Finish. The RecoverAssist builder will allow you to make a standalone bootable media or a bootable backup media. Attach the media and select the option required. You do not need to use this process to make a bootable backup; a backup will automatically be made bootable the first time the backup job runs if you left Bootable Backup Media selected in the Set up destination step.
To learn more about RecoverAssist, see Recover System tab
Launch BitLocker encryption tool
If this box is ticked, the BitLocker Encryption tool will open when you select Finish. When the tool opens, you can use it to encrypt the drives. This should be done before the backup job runs, because if an unencrypted drive is used for a BitLocker backup job, the job will fail. The BitLocker encryption tool can run in the background after BackupAssist has been closed.
To learn about the BitLocker encryption tool and how to use it, see BitLocker Encryption guide.
Your Exchange Server backup job has now been created.
Note: BackupAssist's reports can be used to review the results of each backup job. Backups should also so be checked by performing a test restore. Regular test restores should be part of your backup solution.
What's next
- To learn about monitoring backup jobs, see Monitor backups
- To learn about the other backup settings available, see Settings tab
- To learn about the options available when you edit a backup job, see Manage backup jobs