Rsync is a backup destination for File Protection backups, which allows you to back up data across the internet to an rsync host server. Adding rsync backups to your backup strategy is an excellent way of insuring yourself against data loss. Critical files can be copied to a secure, off site location, away from your office, and you can also use built-in rsync encryption to protect the data on the rsync host.
This feature requires the Cloud Backup add-on
To learn more, see Rsync host setup
Rsync is an open source application used to synchronize files and directories from one location to another. BackupAssist’s implementation of this technology is in the form of an rsync destination that allows File Protection backup jobs to back up data across the internet. The data transfer is minimized because only the data that has changed is transmitted and all data packets are compressed. This means your internet backups will take less time when compared other remote backup methods such as FTP..
Rsync uses a checksum method to perform the bit level data transfer. Rsync checks whether any data has changed by looking at the size of a file and its modification date. If no data has changed, rsync will not transfer the data, saving time and bandwidth. If files do not match, rsync uses a checksum method called a rolling checksum on the changed file to see what has changed. It will then transfer only the altered or appended data within the file.
The performance and flexibility of backing up across the internet can depend on how rsync is implemented. Below are some key considerations when planning your rsync backup solution.
Backup user accounts
Rsync backup jobs require a BackupAssist administrator account with read access to the data source. This is set up using the Backup user identity, option in the Settings tab. The backup job will also need an rsync host account with read-write access to the rsync destination. This is enabled on the host server, and entered in the rsync destination screen.
VSS applications
VSS applications including Exchange, SQL and Hyper-V, can be backed up to an rsync destination using File Protection. For Hyper-V however, we recommended System Protection backups, which do not support the rsync destination but do support granular Hyper-V gest restores.
Exchange databases and SQL databases
VSS applications including Exchange, SQL and Hyper-V, can be backed up to an rsync destination using File Protection. Simply choose the VSS application that you want to back up from the list of detected applications. You can even drill down and choose individual components (databases, storage groups, etc.) to backup. For Hyper-V, we recommended System Protection backups, which do not support the rsync destination but do support granular Hyper-V guest restores.
Synchronizing drive images using rsync
Rsync is a destination for File Protection backups. It is possible for the data source to be an System Protection image backup, but this solution is not recommended because significant performance issues that can arise. If you want to back up important files to an rsync host, the best way is to back up those files using File Protection directly. Continue to create your image backups, but back up the important files independently using a File Protection rsync backup job.
We also advise against using File Protection’s rsync, to transfer File Archiving backups to an rsync host. This is because rsync uses a checksum method to perform the bit level data transfer. Rsync checks whether any data has changed by looking at the file size and modification date. This is fast and simple on a regular file system, but if you have a very large single archive file (>10 GB) it will take much longer to complete, even if only a small element has changed.
Single-Instance store
File Protection backups cannot use single-instance store when the backup is saved on a ReFS formatted rsync destination. This means all the data will be backed up each time the backup job runs.
Backup frequency
Run your rsync job regularly. Regular daily backups will keep your data transfer to a minimum and your data up-to-date.
Simultaneous backups
If you have a large number of backup jobs sending data to a host at the same time, the connections may become unreliable. It is recommended that you limit the host connections 5 at a time. Depending on storage requirements and the bandwidth available, you may increase this number with caution.
Rsync backups are incremental backups. The first time you perform your backup, no data will exist on your data host so a full backup is required. Doing this via an internet connection may not be practical so you may have to seed your first backup to the rsync host. Once the initial seed to the data host is complete, each successive backup will be an incremental backup of data that has changed.
How to Seed an rsync backup
Two data seed options are available for rsync host servers that you have local access to.
Option 1 – Seeding a permanently offsite data host
You can use BackupAssist’s Seed Backup function, to automatically seed data offsite using a removable media, which can be physically transported to the data host so that the data can be uploaded locally.
To seed your data using this method, follow these steps:
- Connect a removable media device to the machine running BackupAssist.
- Select your backup job from the Manage menu.
- Select Edit from the top menu.
- Select the Destination left menu item.
- Click the Seed backup button.
- Select the location of an empty folder on your portable media.
- Once the seed is complete, your portable media should contain:
- A directory with the seeded data.
- A README.txt file containing instructions on how to copy the seed to your rsync server.
- An .sh script file, which is used to copy your data to your rsync server.
- Transport the portable media containing the seed to the site where your rsync server is located.
- Connect the device to the rsync host server and copy the seed to it:
- Go to the Start menu > CopSSH > Start a Unix BASH shell.
- Enter the following command: bash "/cygdrive/e/SeedFolder/seed.sh".
- Run the following command in your shell: bash "/mnt/usbdrive/SeedFolder/seed.sh".
- A complete seed of your data should now be copied to your rsync server. Each successive backup from now on will be an in-file delta incremental backup of data that has changed.
For a Windows server (assuming the seed is located on E:\SeedFolder)
For a Linux or Unix server (assuming the seed is located in /mnt/usbdrive/SeedFolder).
Option 2 – Bringing your data host onsite to perform the seed.
This method is suitable for “standalone” data hosts (where a data host is not shared among multiple clients) that can be physically transported onsite – such as NAS devices.
Seeding your data is easy – simply follow these instructions:
1. Connect your data host to the LAN and make a note of its IP address / Hostname.
2. Create your BackupAssist rsync job, run it at convenient time and wait for it to complete.
3. Move your NAS to its permanent location.
4. Update the job settings in BackupAssist to reflect the new IP address / Hostname.
Note: If you enable or disable encryption for an rsync job, BackupAssist will need to re-seed the backup to the rsync backup destination with a full set of data.
When backing up with rsync over an SSH connection, the connection is established using public key cryptography. This involves a pair of keys (private and public) that are generated using a special algorithm, to make authentication secure without requiring a username or password. When setting up your rsync backup job, and click the Register with server button, BackupAssist will attempt to generate the required authentication keys and store them in the appropriate locations, with the public key copied to the rsync destination. In some instances BackupAssist is not be able to upload the public key to the rsync destination. This article explains how to identify such cases as well as how to transfer the public key manually.
Determining whether public key transfer was successful
Even if registration to the rsync server is successful, you may you receive a SSH authentication failed error after clicking Test connection. Failure to upload the key can happen for various reasons, including insufficient permissions to the public key destination folder or a security setting on your rsync server. To resolve this issue you can transfer the public key file to the rsync server manually.
Follow these steps to perform the manual transfer:
- Click the Register with server button to create the pair of authentication keys.
- Find a file called ba_id.pub on the system running BackupAssist. The default file locations are:
Server 2003: C:\Documents and Settings\All Users\Application Data\BackupAssist vX\.ssh
Server 2008 and later: C:\ProgramData\BackupAssist vX\.ssh. - Once you have located the ba_id.pub file, copy it to your rsync server
The location you copy to does not matter at this stage. - On your rsync server find the location of the .ssh folder.
- If a file named authorized_keys exists in the .ssh folder:
- Open the authorized_keys and the ba_id.pub files in a text editor.
- Copy the contents of ba_id.pub and paste it into the authorized_keys file.
- [Optional] For security reasons, ssh will not allow authentication if the .ssh folder and authorized_keys file are readable and writable by other users. To make sure permissions are correct, run the following commands:
- Now, test the connection to your rsync server in BackupAssist by clicking the Test connection button.
vX refers to the version of BackupAssist you have installed.
Application Data (Server 2003) and ProgramData (Server 2008 and later) folders are hidden by default, so you may need to modify your Windows settings to show hidden files and folders.
This folder is commonly found in the /home/<sshuser> folder on your rsync server (where <sshuser> is the user that was entered in BackupAssist to authenticate to your rsync server), but can be in a different location depending on your setup.
If the authorized_keys file does not exist in the .ssh folder, move the ba_id.pub file to the .ssh folder and rename it to authorized_keys.
chmod 700 .ssh
chmod 600 .ssh/authorized_keys
BackupAssist should now authenticate to your rsync server successfully.
Note: While a public key can be safely copied and distributed anywhere, the private key needs to remain private. If someone obtains your private key, they can use it to impersonate the user and gain access to your rsync server.
Conclusion
When backing up with rsync over an SSH connection, a public/private authentication key pair is created and used to make a secure connection to the rsync destination. If you experience an authentication error when testing the connection to the rsync server it may be because BackupAssist was unable to transfer the public key to the destination server. In this case, you can manually copy the contents of the ba_id.pub file on the machine running BackupAssist and paste it into the authorized_keys file on your rsync server. Alternatively, if the authorized_keys file does not exist on the rsync server, you can rename the ba_id.pub file to authorized_keys and move it to the .ssh folder. This should allow BackupAssist to successfully connect and authenticate to your rsync data host.
If you have any questions about this article, please email us at support@backupassist.com
How to create an rsync backup job
Launch BackupAssist and follow the steps outlined below:
- Select the Jobs tab.
- Select Home.
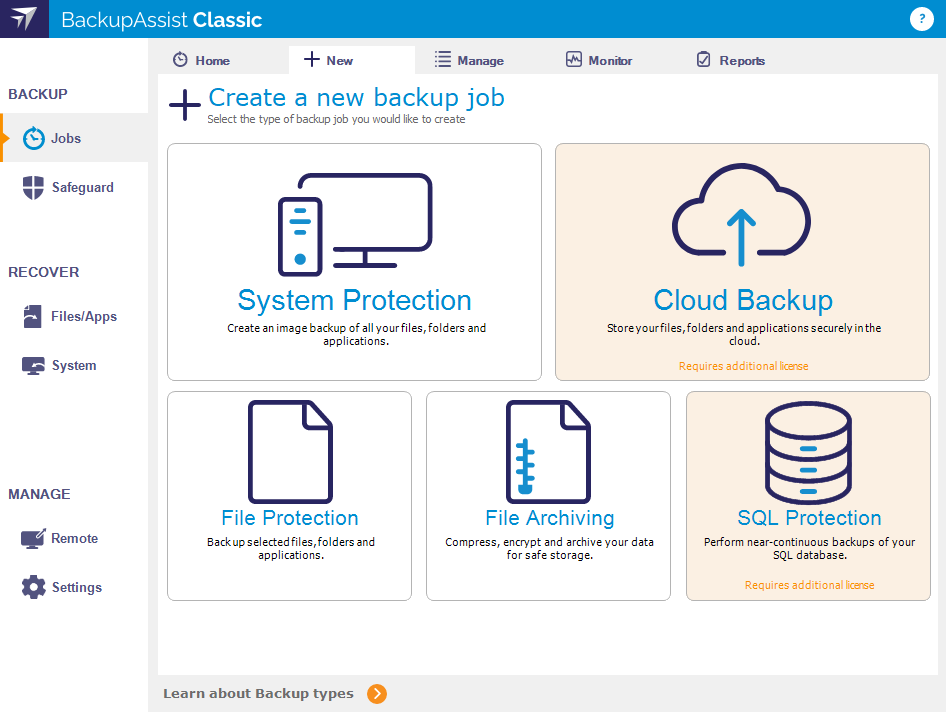
- Select Create a New Backup Job.
- Select File Protection.
- Selections.
This step is used to select the data and applications that you want to back up. Any VSS applications detected will be displayed here as application directory containers. - Destination media.
The destination screen is used to select the rsync destination. The rsync destination will be an rsync host that you have setup. To learn more about setting up an rsync destination, see Rsync host setup - Select Rsync for your backup destination.
- Select Enable Rsync file based encryption if you want the backup data to be encrypted.
- Click Next.
- Schedule.
This step is used to select when and how you would like the backup job to run, and how long you would like the backup to be retained for. A selection of pre-configured schedules, called schemes, as well as a custom scheme, can be selected. - The schemes available will depend on the type of destination media selected in step 5.
- Clicking on a scheme will display information about the schedule used.
- Set up destination.
This step is used to configure your rsync destination. - Rsync Server: Enter your rsync server name (or IP address).
- Server Type: Select Rsync over SSH, Rsync Daemon or Rsync Daemon over SSH tunnel.
- Port: The default port will display for the server type selected.
- Path on server: It is best to use a new, empty directory for this path. The parent directory must exist. The sub directories will be created when the job is first run: /parent/sub_directory/.
- If your host is running Windows, enter a normal Windows path here, such as C:\Backups. Alternatively, enter a path relative to the user’s home directory using a tilde ( ~/Backups).
- If your data host is running Linux, you can use an absolute path by starting with a slash or a path relative to the user’s home directory by starting with a tilde (e.g. “~/Backups”).
- Username: Enter the username that was activated when the rsync host was set up.
- Register with server: Selecting this option will prompt you to enter the password. BackupAssist will then create a public / private key pair to authenticate you to the data host.
- Test connection: Use this button to test your connection to the rsync server. If this step fails but registration succeeded, the problem may be that the Path on server cannot be accessed.
- Notifications.
Once a backup job has completed, BackupAssist can send an email to inform selected recipients of the result. This email notification is enabled during the creation of the backup job, but you must also provide your mail server settings so that the notifications can be sent. To learn how to configure your mail server for BackupAssist, see Email server settings. - Select Add an email report notification.
- Enter recipients into the Send reports to this email address field.
- Enter recipients into the Also send reports to this email address field. You can then use the drop down list to select the condition under which the email is sent.
- If you want to know when a backup media has been changed, select Add an email reminder notification and enter the email addresses to send the notifications to.
- Click Next.
- Prepare media.
This step will be skipped because rsync backups do not use removable media. - Name your backup.
Provide a name for your backup job, and click Finish.
If this is the first time you have created a backup job, you will be asked to provide a Backup User Identity. To learn more, see Backup user identity

An Exchange VM Detection tab will be available if you are backing up an Exchange VM guest. To learn more, see Hyper-V best practices .
Select the volumes, folders, files and applications that you want to back up, and click Next.

Follow these steps to select a media:

Schedule considerations:
To learn more, see Backup Schedules
Select an appropriate scheme, and click Next.


To enable email notifications:
To learn more, see Edit Job : Notifications
Note: After the backup job has been created, you can modify the notification's recipients, set additional notification conditions and include print and file notification types. To learn more, see Email address list
Your File Protection backup job has now been created.
Warning: Rsync backups are incremental but the first time the backup job runs, a full backup will be required. You may therefore need to seed the first backup to the rsync host. See How to Seed an rsync backup for the seeding options available.
Note: BackupAssist's reports can be used to review the results of each backup job. Backups should also so be checked by performing a test restore. Regular test restores should be part of your backup solution.
What's next
- To learn about monitoring backup jobs, see Monitor backups
- To learn about the other backup settings available, see Settings tab
- To learn about the options available when you edit a backup job, see Jobs list