A Full VM Recovery uses a backup of a guest to recover that guest to a Hyper-V host. This will return the guest and its operating system, applications, data and services, to a previous working state. You can recover the guest to its original location, overwriting the existing guest, or to a different location on the host. You can also recover the guest’s VHD (virtual hard drive) to a different Hyper-V host and use that VHD to create a new guest.
Full VM Recovery requirements:
- Full VM Recovery supports System Protection, File Protection and File Archiving backups.
- The host server the guest is being recovered to must have at least 4GB of memory available – which will be used by the recovered guests.
- A guest can only be recovered to a Hyper-V Host that runs the same version of Windows Server (or higher) as the original Hyper-V host.
When a guest is successfully restored to a Hyper-V cluster shared volume (CSV), it will become available on the Hyper-V machine that it was restored to.
- If the restore replaces the existing guest, the CSV settings will be retained and the guest will be added back to the cluster.
- If the restore does not replace the existing guest, the CSV setting will need to be manually configured to add the guest to the cluster.
To perform a Full VM Recovery, follow the steps below:
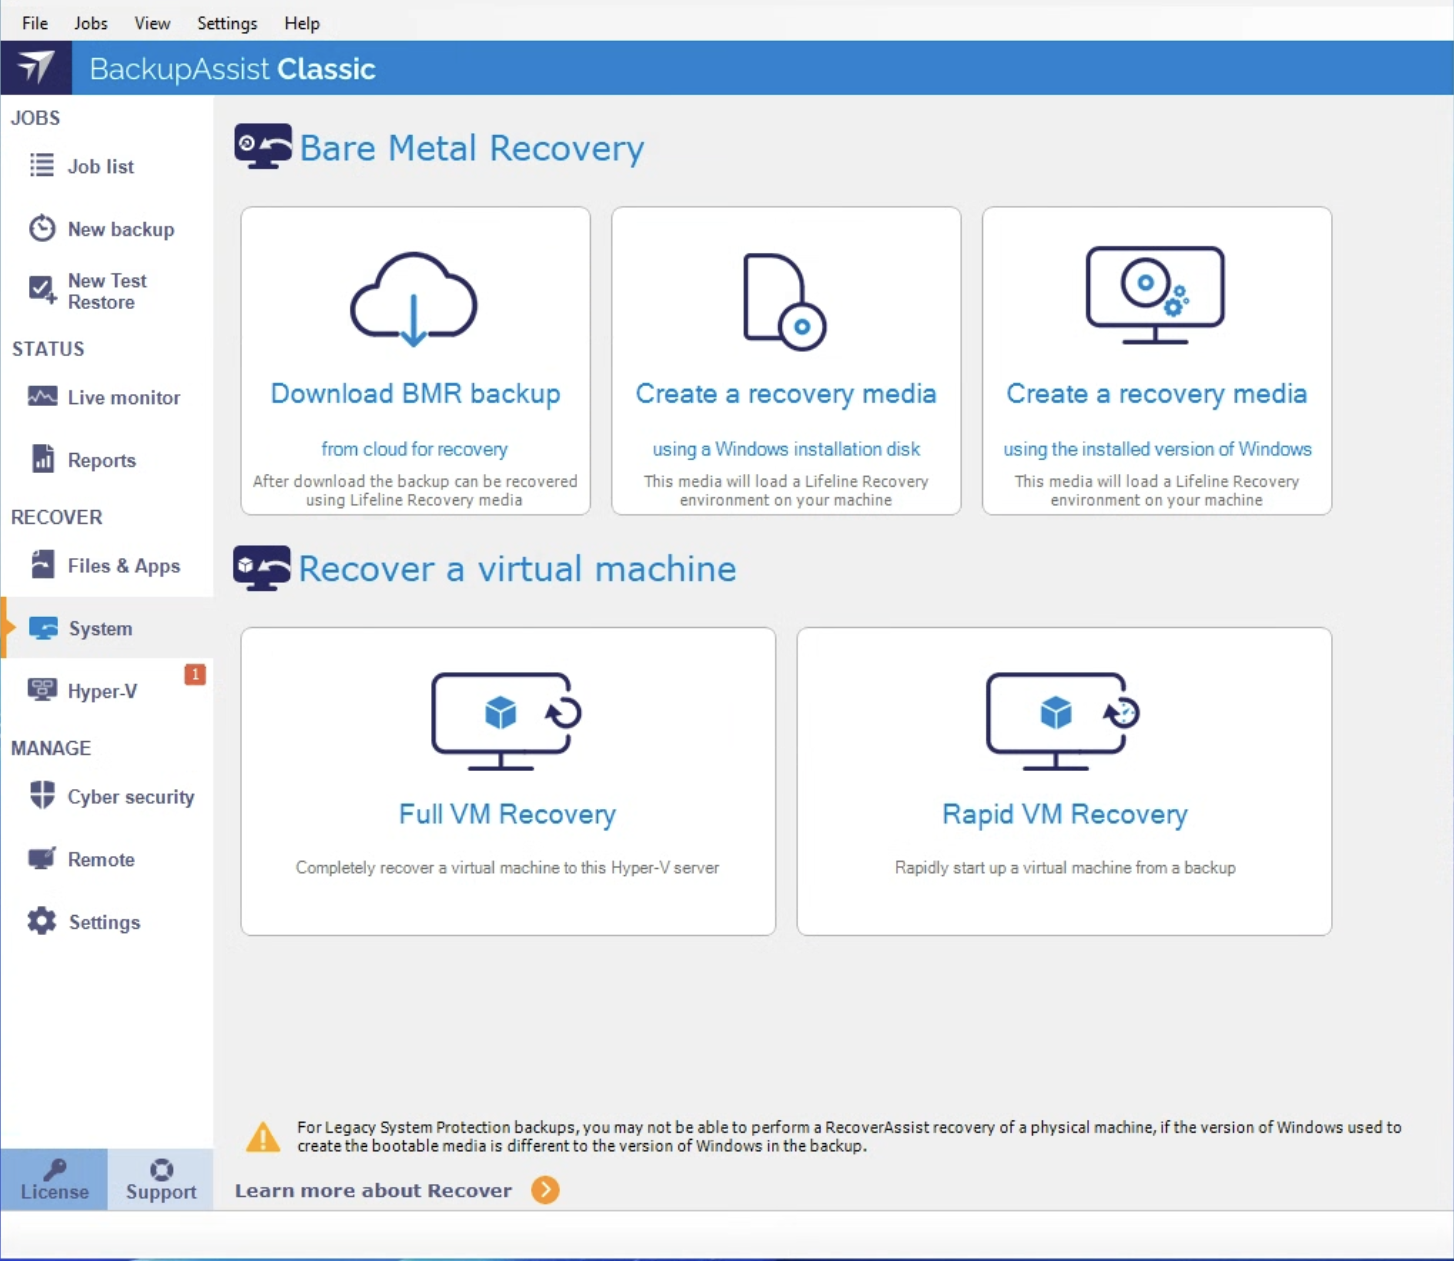
- Select the System tab
- Select Full VM Recovery
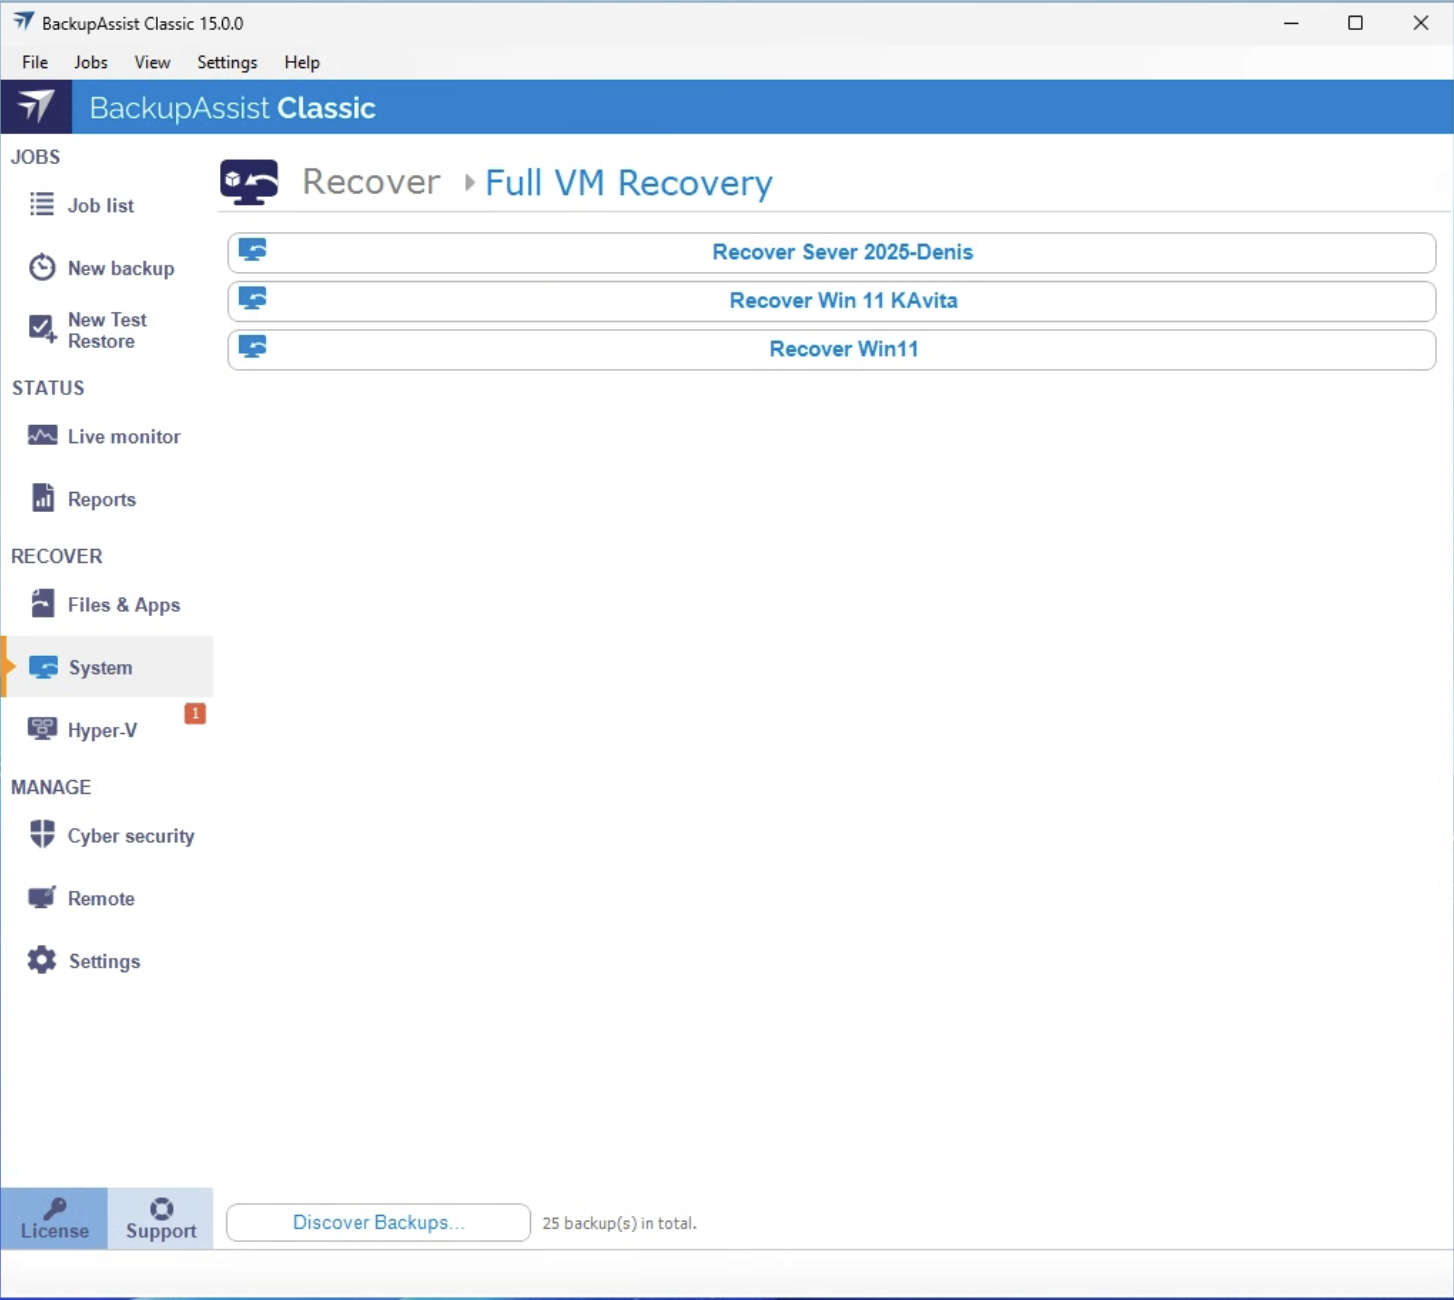
- Select the guest.
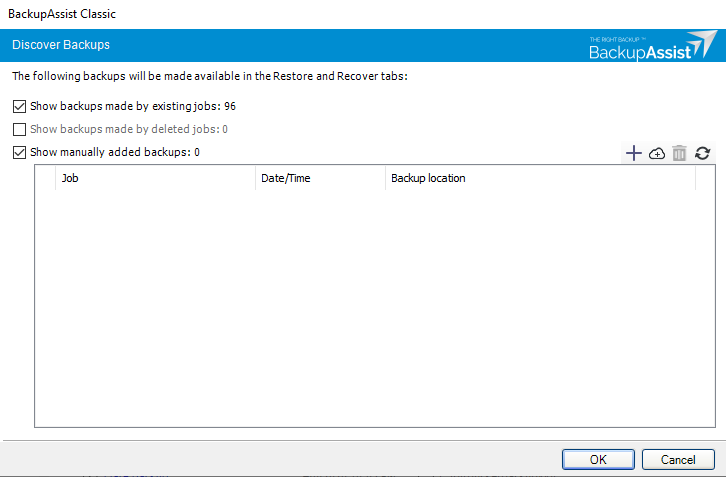
- If you select Show manually added backups, backups from other BackupAssist installations that were added using the + option will be available when you go back to the main restore screen.
- If you select Show backups made by deleted jobs, backups made by deleted backup jobs will be displayed and available when you go back to the main restore screen.
- If you select Show backups made by existing jobs, only backups made by the current list of local backup jobs will be shown. This is the default list you saw before using the Discover Backups option.
- Selecting the plus symbol will open a browse dialog that can be used to locate backups made by other BackupAssist installations and add them to the Discover Backups screen.
- Selecting the cloud symbol will open a dialog from where you can select and configure the cloud destination that you want to restore from. This option allows you to restore from a backup created on another machine or a deleted job.
- Selecting Delete, removes any selected backups that were added using the + option.
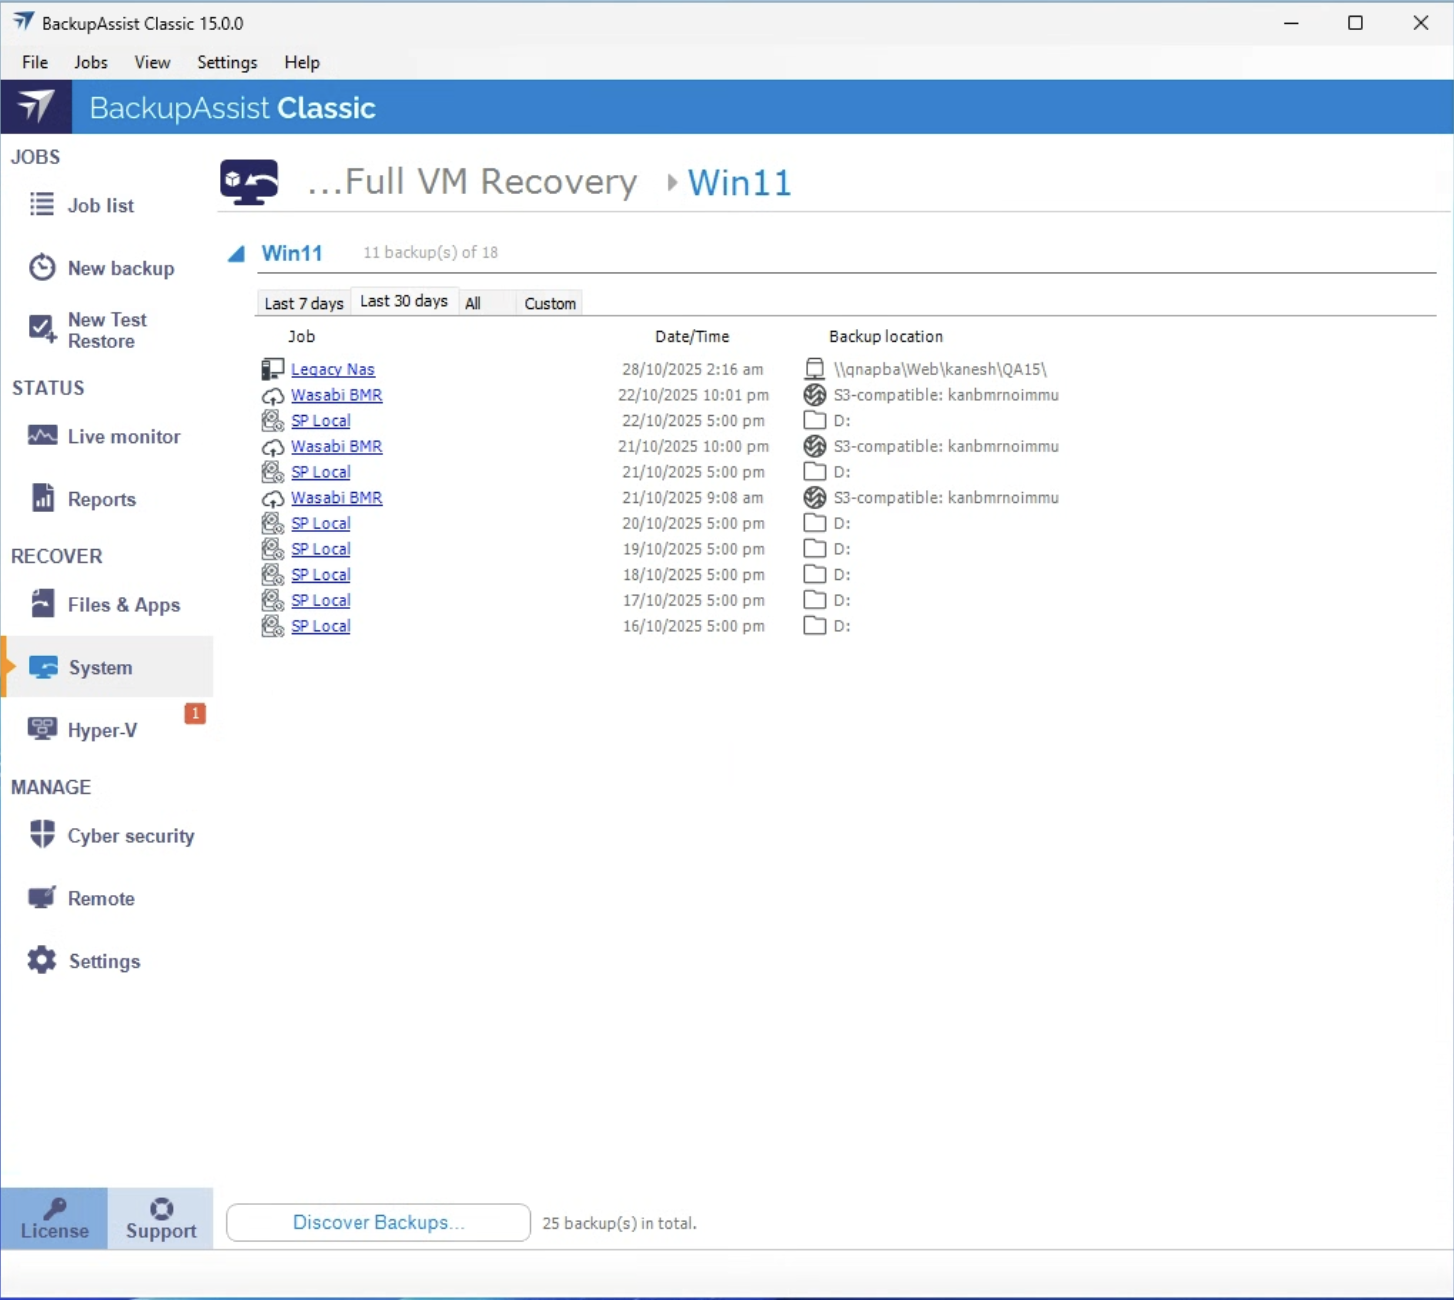
- Select the backup
- All - shows all backups available.
- The Last 7 days and Last 30 days tabs - will display the backups within those ranges.
- Custom - allows you to select a specific date range and display backups for that period.
- Select the guest within the backup.
- Select how you want the guest to be recovered
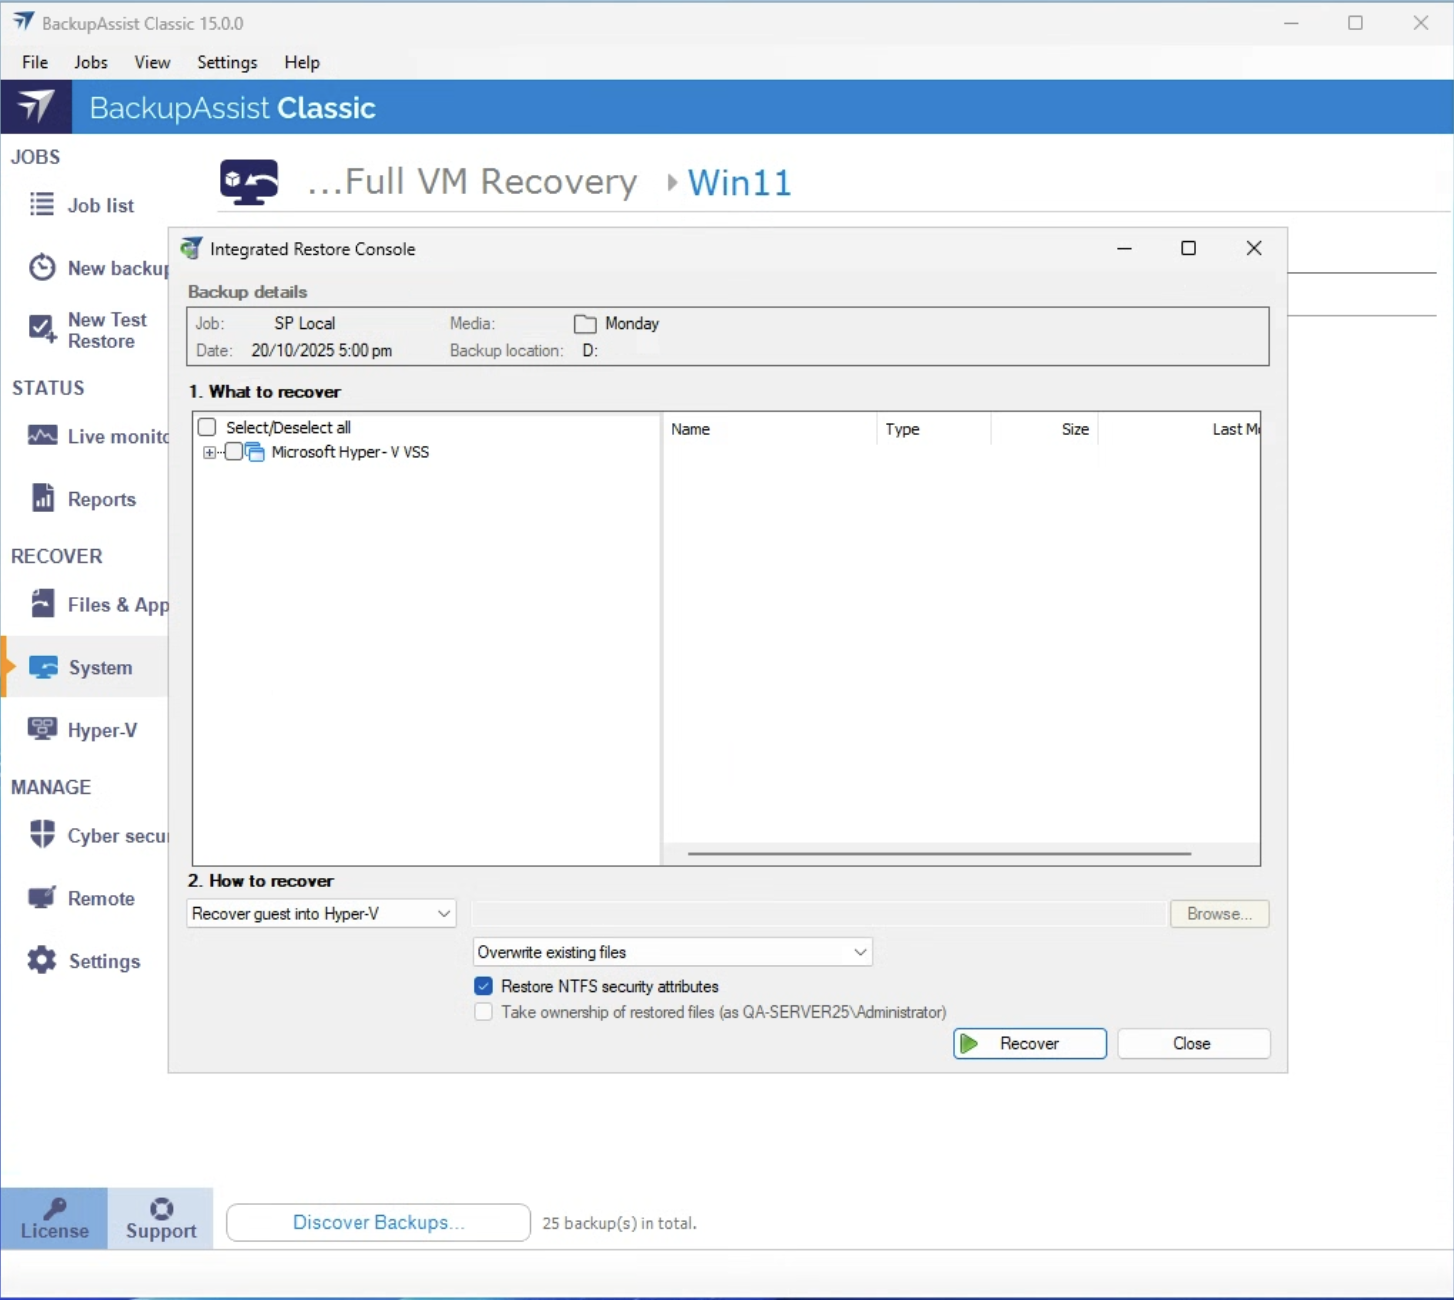
- Recover guest into Hyper-V – this will recover the guest to its original location.
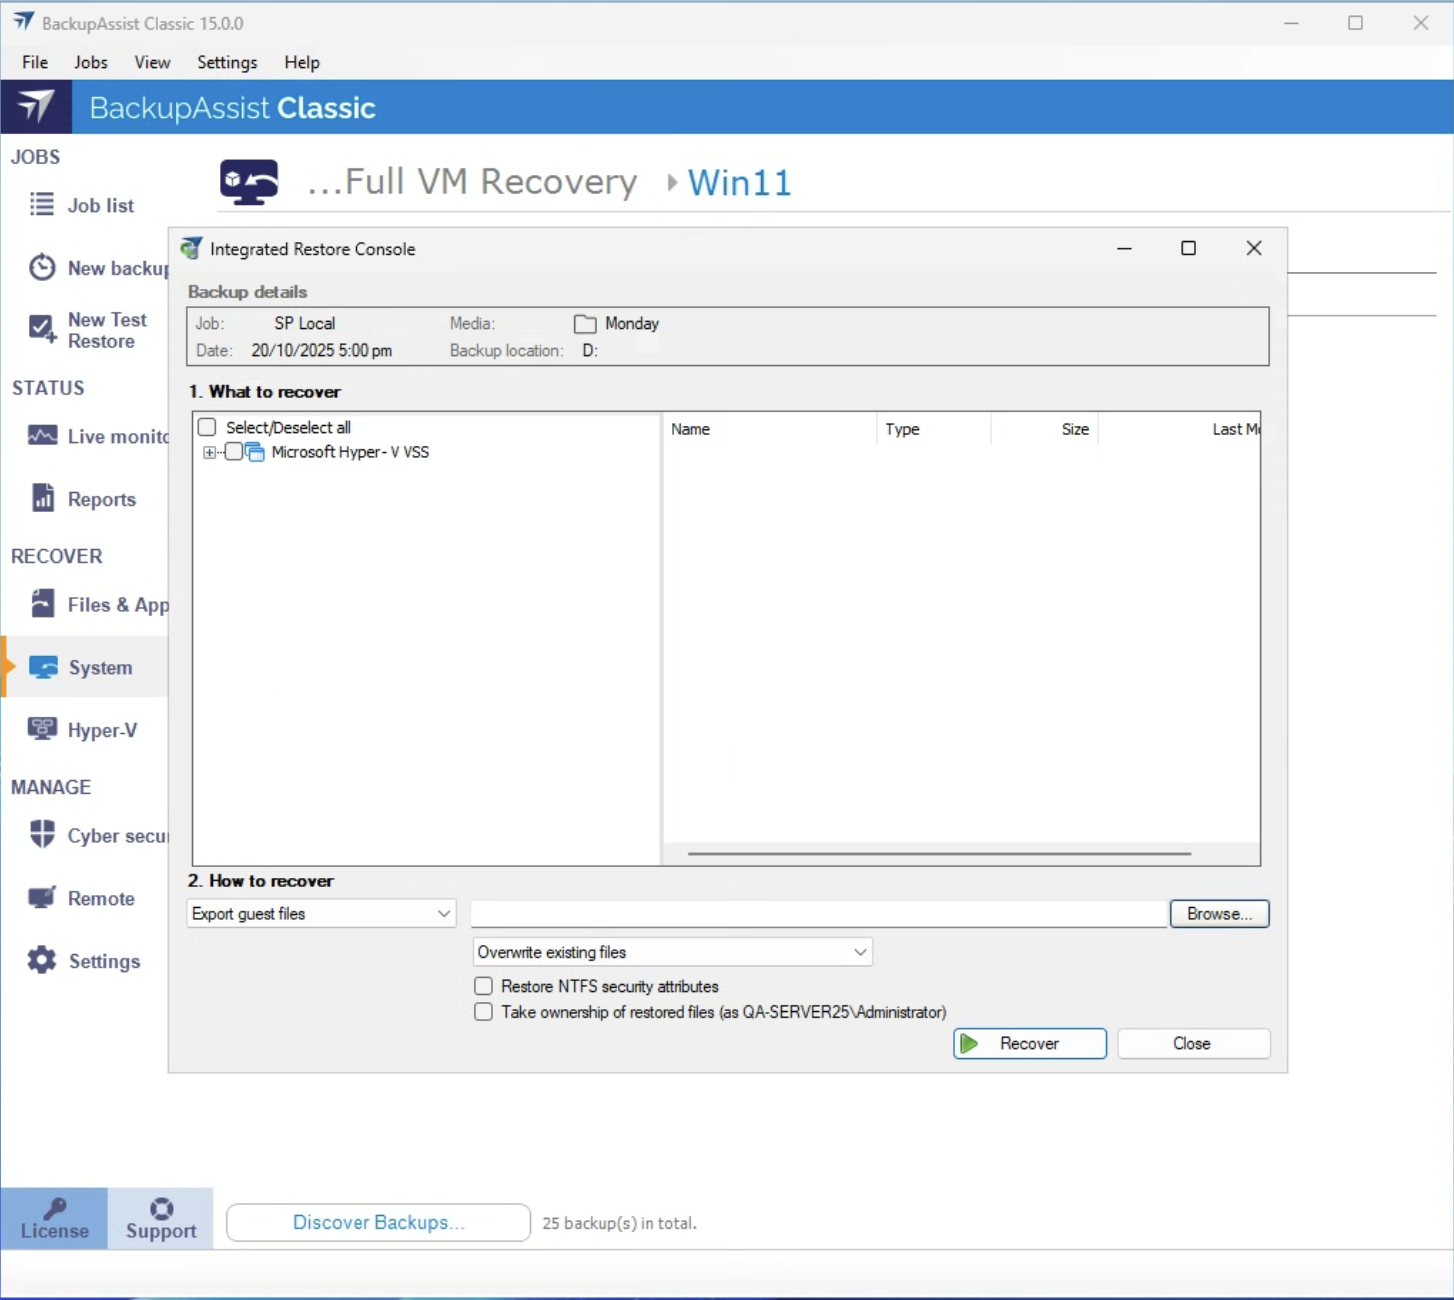
- Export guest files – this will copy a guest’s files to a selected location. Use the Browse button to select the location and select the Overwrite conditions that should apply. Once the guest’s files have been exported, you can use them to create a new guest on another host.
- Select the Recover button
- Complete the guest recovery
When you select Full VM Recovery, the Full VM Recovery screen will open and display all of the guests that have been backed up by this installation of BackupAssist.
Select the guest that you want to recover from the list of backed up guests. When you make a selection, the screen will reload and display all available backups of that guest.
If you have a non-VSS guest backup, use the Files/Apps tab to restore the guest VHD to the host, and use the VHD to create a new guest.
The Full VM Recovery screen can also show guests backed up from other machines added using the Discover Backups button.
Discover Backups
This option allows you to add and restore from backups created by other installations of BackupAssist and backups made by local jobs that have been deleted.When you select the Discover Backups button, the Discover Backups screen will appear.
Selecting only one of these options means only those backups will be shown when you go back to the main restore screen. Combinations of these 3 options can be selected to get the set of backups that you want.
Select the backup that you want to use for the recovery. The tabs can be used to filter the backups shown. Selecting a backup will open BackupAssist'sIntegrated Restore Console.
There are tabs along the top that can be used to filter the list of backups shown. Using these filters will help in locating the required backup.
The display tabs available are:
From the Integrated Restore Console use the What to recover pane to tick the box next to the guest that you want to recover. You can select more than one guest but they will share the restore setting used.
Use the How to recover drop down box to select the method required: recover the guest into a Hyper-V host or export the guest files to another location.
The recovery process will begin and the Integrated Restore Consolewill display the progress.
If you selected Recover guest into Hyper-V, use the Hyper-V Manager to start the recovered guest. If you selected Export guest files, create the new guest using those files.
If you selected Recover guest into Hyper-V, you will need to open the Hyper-V Manager and start the guest. Right click the guest and select Start, as shown in the screen shot below.
If you selected Export guest files, you can create the new guest. When you create the new guest, select the recovered VHD in the Connect Virtual Hard Disk step, as shown in the screen shot below.
The Hyper-V guest has now been recovered.
Disaster Recovery resources
BackupAssist's blog includes Disaster Recovery related articles that explain best practices and advice on how to make the most of BackupAssist in your disaster recovery process.
- A disaster recovery graphic that explains a recovery in 4 simple steps. Read the article.
- How to plan for a BackupAssist / RecoverAssist recovery. Read the article.
- P2V fir disaster recovery. Read the article.
- How to perform a P2V recovery with BackupAssist. Read more.
