This section explains how to restore files inside Hyper-V guests using a System and Volume, File and Application or Zip Compression backup. Hyper-V Granular Restore allows you to restore individual files from a guest using a Hyper-V backup of one or more guests.
This feature requires the Hyper-V Advanced add-on.
Note: Restoring a full guest is a recovery process. To recover a Hyper-V guest to a host, see Full VM Recovery You can also perform a Rapid VM Recovery (Legacy) of a guest using the Hyper-V Advanced add-on.
System Protection backups can use Data containers as backup destinations. BackupAssist automatically mounts Data containers when restores are performed. However, there may be times when you want to do this manually. For example, if you want to check what is inside a Data container or have it available for another task.
To manually mount a Data container:
- Open Disk Management.
- Click the Start button.
- Type diskmgmt.msc into the Search Programs and Files text box.
- Click OK.
- Open Run from the Apps screen.
- Type diskmgmt.msc into the Search Programs and Files text box.
- Click OK.
- Select Action from the Disk Management menu.
- Select the menu option Attach VHD.
- Enter the path of the Data container that you want to mount and click OK.
- Right click BA_VHD_Container, select Change Drive Letter and Paths, and select Add.
- Select a drive letter for the Data container, using the drop down box, and select OK.
For Windows Server 2008 R2, SBS 2011 and Windows 7
For Windows Server 2012 and Windows 8 and later
The Disk Management console will open.
You will now have a drive named BA_VHD_Container in your list of available drives.
You can now browse the Data container using Windows Explorer.
To learn more see, Data Container guide
To perform a Hyper-V Granular Restore, follow the steps below:
- Select the File/Apps tab
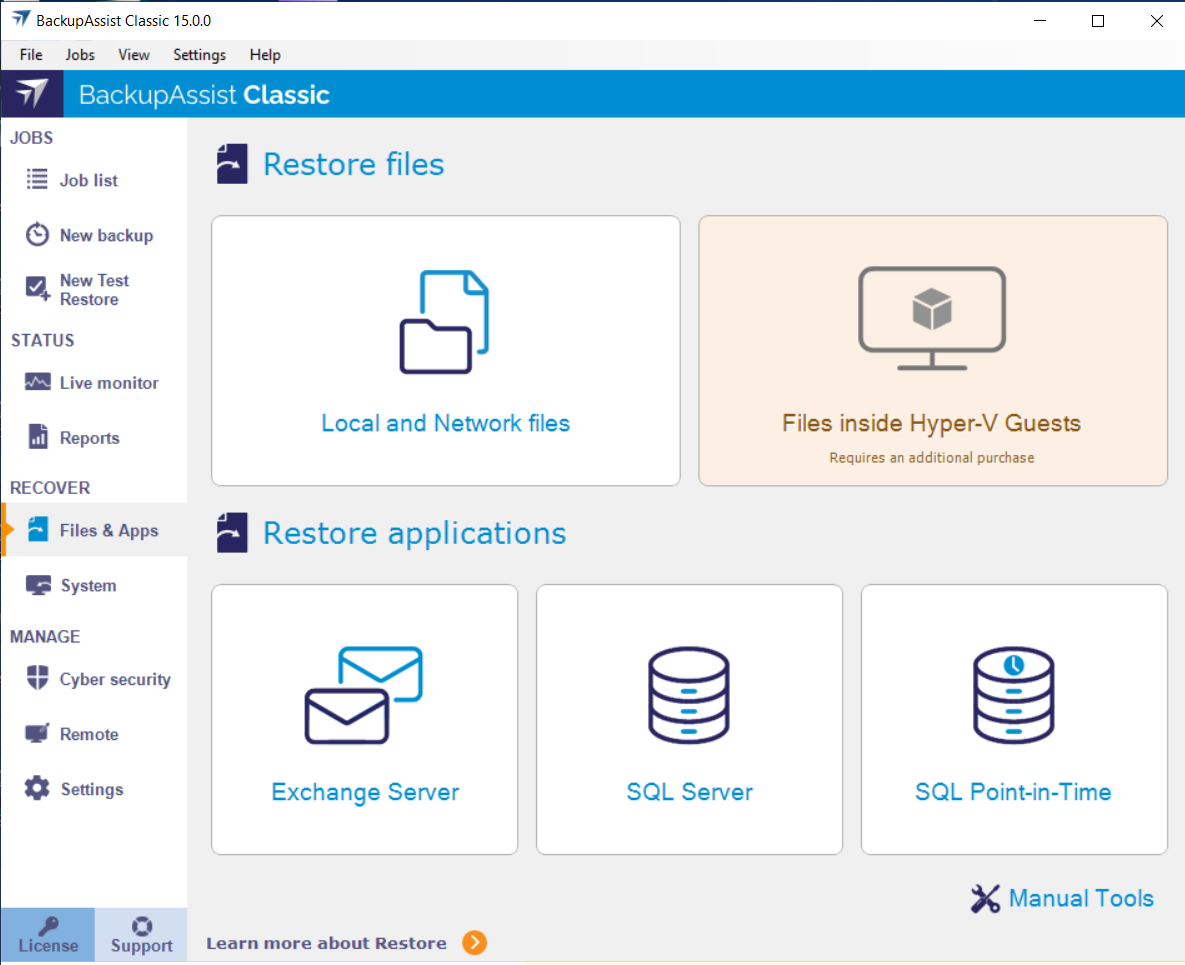
- Select Files inside Hyper-V Guests
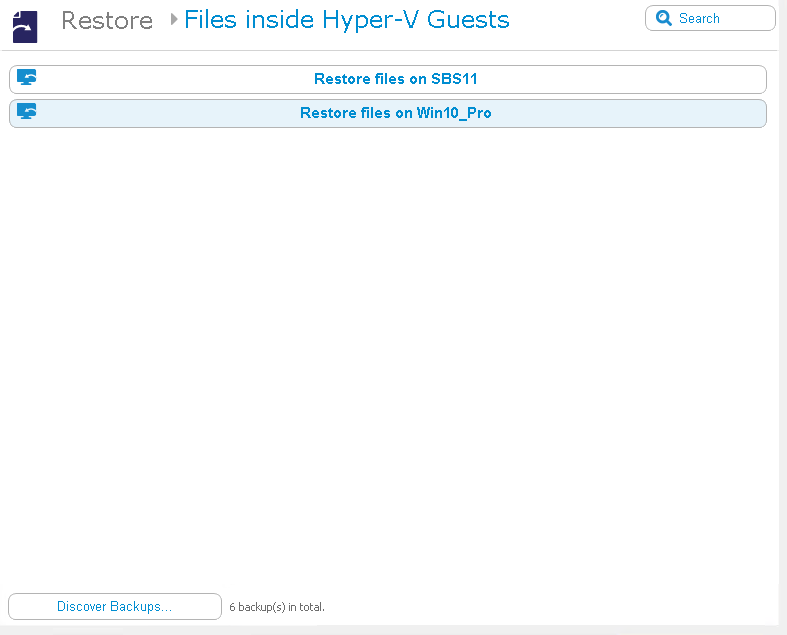
- Select the guest
- For a File Protection backup select Catalog Hyper-V Guests under Replication Options.
- For a System Protection backup select Catalog Hyper-V Guests under Imaging Options.
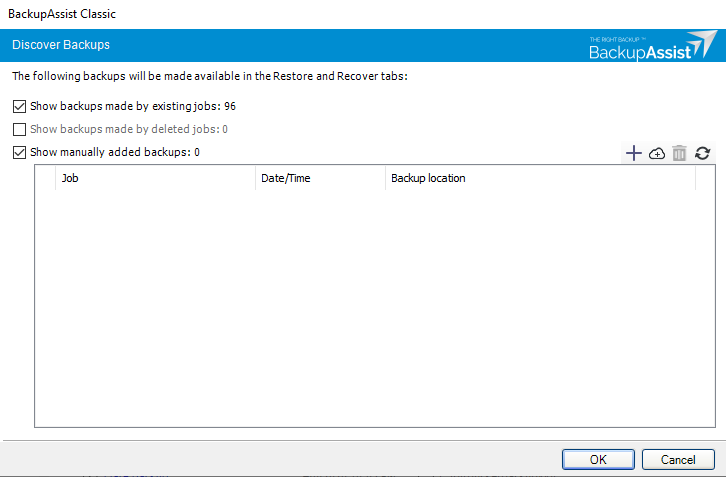
- If you select Show manually added backups, backups from other BackupAssist installations that were added using the + option will be available when you go back to the main restore screen.
- If you select Show backups made by deleted jobs, backups made by deleted backup jobs will be displayed and available when you go back to the main restore screen.
- If you select Show backups made by existing jobs, only backups made by the current list of local backup jobs will be shown. This is the default list you saw before using the Discover Backups option.
- Selecting the plus symbol will open a browse dialog that can be used to locate backups made by other BackupAssist installations and add them to the Discover Backups screen.
- Selecting the cloud symbol will open a dialog from where you can select and configure the cloud destination that you want to restore from. This option allows you to restore from a backup created on another machine or a deleted job.
- Selecting Delete, removes any selected backups that were added using the + option.
- Select the backup
- All - shows all backups available.
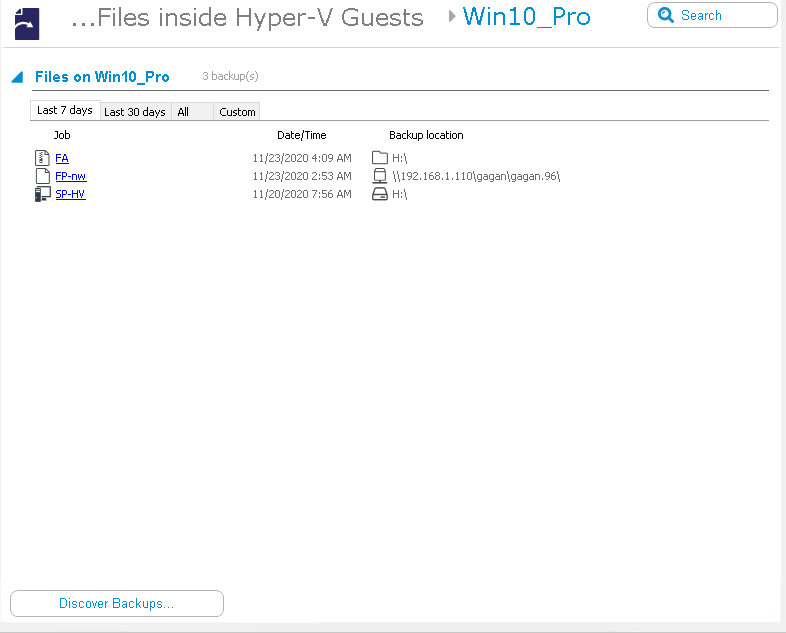
- The Last 7 days and Last 30 days tabs - will display the backups within those ranges.
- Custom - allows you to select a specific date range and display backups for that period.
- Select the data
- Select the destination
- Use the Browse button to locate and select the restore destination.
- Use the drop down box to set the overwrite rules. The overwrite rules will apply if the files being restored encounter files with the same name in the restore destination.
- Overwrite existing files: the restored files will overwrite files in the restore destination.
- Do not overwrite existing files: the restored files will not overwrite files in the restore destination. This means the files will not be restored.
- Only overwrite older files: if a source file has changed since the backup was made it will not be overwritten.
- Review the Restore NTFS security attributes option
- Review the Take ownership of restored files option
- Start the restore
- Select Done
The Files\Apps tab has a Home page and a Tools page. The Home page is the default page and the starting point for performing a restore. The Tools page should only be used by experienced users or with the assistance of BackupAssist Technical Support.
This step starts the guided restore process and will take you to the Hyper-V Granular restore screen, which will display the guests backed up by this installation of BackupAssist.
Select the guest that you want to perform the restore for. The next step is to select the backup, but if you are not sure what backup contains the files you want to restore, the Search option will help you locate them.
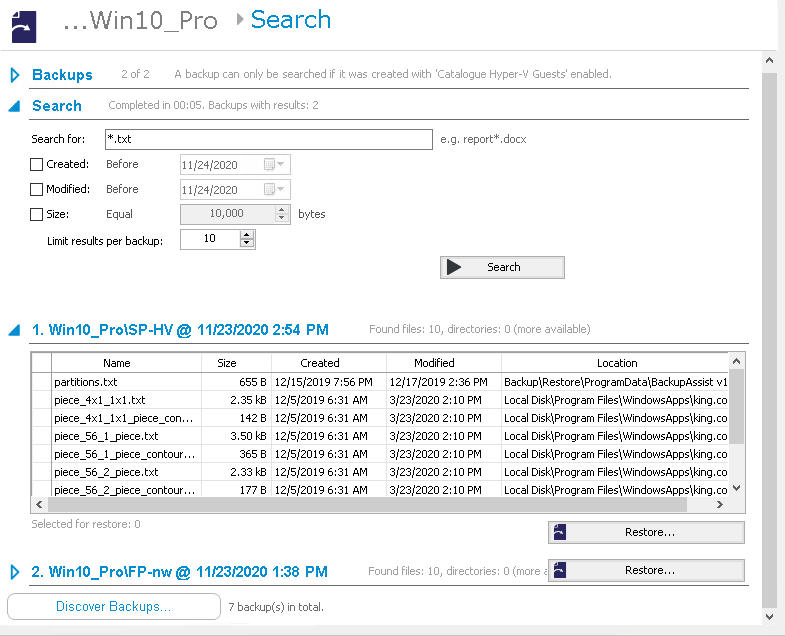
The Search option allows you to search multiple guests and backups to find the files that you want to restore.
The Search feature supports File Protection and System Protection backups.
When you select the Search button, the Search screen will appear.
Backups section
Allows you to use the Jobs filter, to limit the search to specific backup jobs. You can also use the Backup date filter to search within a specified date range.
Search section
Note: To Search a VM backup, you need a System Protection or File Protection backup that was created with the Catalog Hyper-V Guests option ticked. To enable this option, Edit the backup job and select Replication options for File Protection and Imaging options for System Protection, and tick the box next to Catalog Hyper-V Guests.
Enter a search term associated with the name of the file you want to find. The Search for field will take the string provided and search for occurrences of that string in a file or directory name. The results of the search are displayed by backup.
Refine the search
You can refine your search using the Search section’s Created, Modified and Size options. Ticking any of these options will activate a drop down list of variables to select from. For Created and Modified, you can select a date using the Calendar selection fields. For Size, you can select the file size in bytes.
To perform a restore, select the files that you want to restore and select the Restore button.
Note: To be able to use the Search feature for Hyper-V guest backups, the backups must be cataloged. A backup will only be cataloged if it is created by a backup job that has the Catalog Hyper-V Guests option enabled.
Cataloging the Hyper-V guest is enabled by Editing the backup job in the Manage menu as follows:
Discover Backups
This option allows you to add and restore from backups created by other installations of BackupAssist and backups made by local jobs that have been deleted.When you select the Discover Backups button, the Discover Backups screen will appear.
Selecting only one of these options means only those backups will be shown when you go back to the main restore screen. Combinations of these 3 options can be selected to get the set of backups that you want.
When you select the guest, the screen will reload and display all available backups for that guest. Select the backup that you want to restore from.
There are tabs along the top that can be used to filter the list of backups shown. Using these filters will help in locating the required backup.
The display tabs available are:
When you select the backup, the Integrated Restore Console will open. Use the console to select the guest files that you want to restore.
Use the Integrated Restore Console to select the location that you want to restore the data to. You can also use this step to select other restore options like the data overwrite rules.
Where to restore
Follow these steps to select the restore destination and restore options:
If you select this option, the NTFS security attributes the file had when it was backed up will be retained when the file is restored. The NTFS security attributes can be viewed in the Security tab on the file’s Properties
Selecting the Take ownership of restored files tick box will give the current user ownership of the restored files. The user is shown to the right of the text box description.
When you select the Restore button, the restore process will begin. The Integrated Restore Console will display information about the restore job and provide status updates as the job runs.
List all processed files and folders
Selecting this link will open notepad and display a list of the files restored, including their full path.
Encrypted backups
If your backup is encrypted, you will be prompted for the encryption password when the restore job accesses the backup.
This is the password entered in the Set up destination step when the job was created.
If you used BitLocker, the password is required. A BitLocker key can only unlock a drive to create a backup.
Note: It is important that you keep a copy of your password in a safe place, as we cannot assist you with opening password-encrypted files if your password is lost or forgotten.
Once the restore has finished, selecting Done will return you to the main UI.
Your Hyper-V Granular restore has now been completed.


