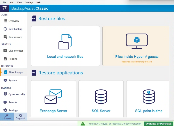
The Files & Apps tab provides access to a set of powerful restore options that can restore files, folders and applications from BackupAssist backups using a guided restore process. When performing data restores, you simply select Local and Network files from the Files& Apps tab and follow the prompts. For Exchange, Hyper-V and SQL, we have specialist tools that provide additional analysis and functionality and additional restore options available for these server applications.
Restore files vs Restore Applications
The main tab provides many restore options grouped under Restore files and Restore applications. The latter is for restoring Exchange and SQL servers. In some cases, you would need to have the relevant add-on to execute specialized restore operations like Files inside Hyper-V Guest and SQL Point-in-Time restore.
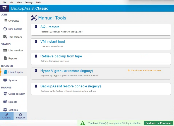
Manual Tools
The Manual Tools option shows the different restore tools available in BackupAssist. You can access specialized recovery tools such as VM Instant boot and restoring a zip backup from tape. These restore tools should only be used by experienced users and BackupAssist technical support.
SQL Restore
This tool can restore individual databases or a SQL Server (including the Master Database) to both local and remote SQL servers. If the backup used a transactional schedule, the databases can be restored to a specific point in time.
Retrieve Backup from Tape
This tool can be used if you are having problems performing a File Archiving restore from a tape media. The tool will directly access the tape (unlike the Integrated Restore Console which loads all backups) and attempt to restore the entire contents of the tape. It cannot restore individual items.
Hyper-V Granular Restore (Legacy)
This tool is used to provide access to individual files within a VHD file (for a guest virtual machine) from an image backup created using System Protection.
The BackupAssist Restore Console (Legacy)
The BackupAssist Restore Console can be used to restore data and VSS applications and eliminates the need to manually look for the specific backups that you want to restore from.
VM Instant Boot
For details of how to use VM Instant Boot, see - vm-instant-boot.htm
BackupAssist Restore Console (Legacy)
The Integrated Restore Console will restore File Archiving backups, File Protection backups (including backups using Rsync) and System Protection backups. The console’s flexibility means it can also restore Exchange Server and SQL Server databases, VSS applications and files from Hyper-V hosts and guests.
How to use the Integrated Restore Console is documented in sections for each restore type.
Can I use the Restore Console to restore any backup I have made with BackupAssist?
The Restore Console has been specifically designed to make restoring easy from File Protection (including Rsync), File Archiving and System Protection backups. It also works with the BackupAssist Tape Archiving Add-on.
The Integrated Restore Console will not restore backups created using the SQL Continuous add-on. For these, the SQL point-in-time restore tool should be used.
Browsing for my backup is taking a long time, why is that?
Loading backups into the Restore Console should take very little time, even for hundreds of backups. However, once you click on a date in the calendar, the Console has to reconstruct the file system from the backup record. That can take a few seconds, depending on the number of files and folders in the backup.
Can I restore my entire system using the Restore Console?
The Integrated Restore Console can restore VSS applications like Exchange, SQL and SharePoint using File Archiving, File Protection and System Protection backups. BackupAssist can also do a bare-metal backup using System Protection, and use that image to recover a system using the bootable RecoverAssist media, created using the Recovery tab.
Can I use the Integrated Restore Console to restore Rsync backups?
Yes, the Restore Console will restore Rsync backups. When you click Restore in the confirmation screen, the Restore Console will connect to your Rsync server and use Rsync to copy the files back to your system. If this computer or user has not connected to the Rsync server before, you will see a dialog box that asks you for the Rsync server details. This dialog box is very similar to the Rsync screen in the main BackupAssist console. Most of the details should already be filled out, but for security reasons you will have to register with the server and supply your password.
Will the Integrated Restore Console work with the BackupAssist Zip-To-Tape engine?
Yes, the Integrated Restore Console is fully compatible with the BackupAssist Tape Archiving Add-on and File Archiving backups. In fact, it will be the easiest way to restore files that have been backed up to tape, taking much of the tedium out of looking for the backup copies you want and restoring them to any location you choose. You can even restore from incremental, differential and copy backups made with the Tape Archiving Add-on.
Will the Restore Console work with encrypted backups I’ve created with BackupAssist?
If your backup is encrypted, you will be prompted for the encryption password when the restore job accesses the backup. It is important that you keep a copy of your password in a safe place, as we cannot assist you with opening password-encrypted files if your password is lost or forgotten.
Backup catalogs
When a BackupAssist backup runs, a file catalog is created for that backup and used by the restore process to find the backup and load its contents. The catalog contains a list of files that were backed up, the location they were backed up from and the backup destination.
Once the catalogs have been loaded, you can browse the contents of your backups. Catalogs stored locally are located in the BackupAssist settings folder: C:\Documents and Settings \ All users\Applicationdata\BackupAssist v8 and later on C:\Users\All Users\BackupAssist<version number>
Having catalogs stored on your local drive means you do not need to connect to all your backup devices to find the specific backup or file that you want to restore. Simply go to the BackupAssist Files/Apps tab Home menu, select the type of data you want to restore and BackupAssist will display all cataloged backups that match your selection. The backups displayed will be for active backup jobs, and grouped by the source data’s location and the restore tool that can be used.
If you wish to load backups for deleted backup jobs and for other backup groupings on the Home page, select Load backups and then Load all known backups. Once you have browsed the selected backup to find the files you want to restore, the Restore Console will ask you to attach the appropriate backup device so the data can be retrieved.
A second copy of each backup catalog is stored on the backup device itself. This gives you the capacity to restore data even if the local hard drive copies of the catalog are lost or inaccessible, or if the backup has been moved from its original location. It also means that you can browse for and load a backup that was made on another machine.
Backup Search
When performing a restore, BackupAssist allows you to use the Search feature to find the backup that you want to restore from.
The Search option allows you to locate files across a selection of backups and to refine those results using filters such as the file's creation time and the file's size.
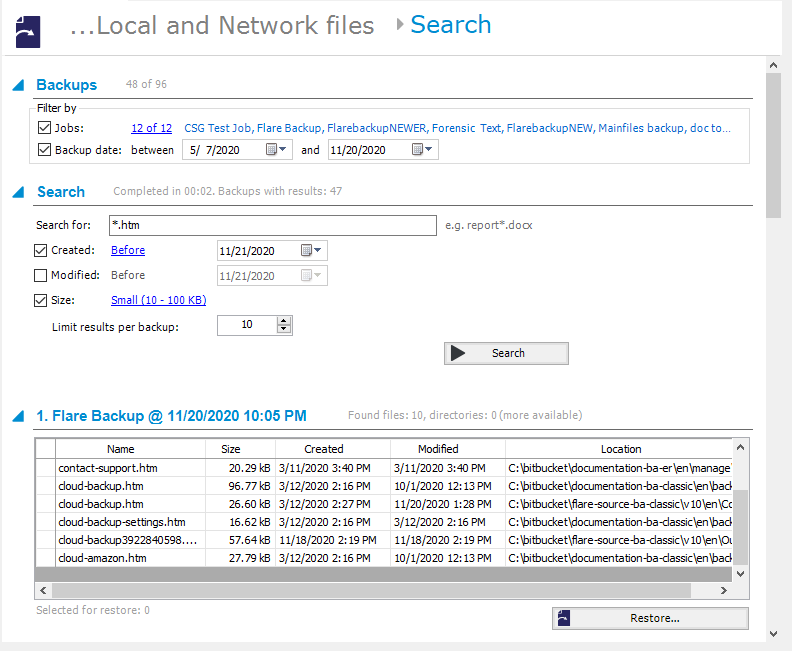
When you select the Search button, the Search screen will appear.
- The Backups section allows you to use the Jobs filter to limit the search to specific backup jobs. You can also use the Backup date filter to search within a specified date range.
- The Search section is used to enter a the name or part of the name of the file you want to find. The Search for field will take the string provided and search for occurrences of that string within a file or directory name. The results of the search are displayed by backup.
To refine the search, use the Created, Modified and Size options. Ticking any of these options will activate a drop down list of variables to choose from. The Created and Modified options allow you to select a date using the Calendar selection fields. Size allows you to select a file size in bytes.


