If your site has suffered a disaster or cyber event and both your system and on-site backup device can no longer be used, you can perform a VM Instant Boot in Azure Cloud Services if you have a cloud backup available. This allows you to achieve Business Continuity in the Cloud, and it means you can bring the original system back online quickly with just a cloud backup, which is stored safely offline. A VM instant boot system can be launched quickly and continue operating until a convenient time is found to perform a full system recovery.
Running VM Instant Boot in the cloud is more involved than a standard VM Instant Boot as you need to create a virtual Hyper-V server in Azure Cloud Services to perform the recovery. It involves the following steps:
- Having a system image backup (already) in the cloud
- Using Microsoft Azure to create a virtual server in the cloud
- Configuring the virtual server as a virtual Hyper-V server
- Using BackupAssist Classic to download the backup
- Following the standard VM Instant Boot process to create a bootable VHDX and launch your system as a VM
1. System Image Backup in the Cloud
- BackupAssist Classic Version 14 introduces the Disk to Cloud capability that allows you to back up your system's disks directly to the cloud. Such backups are capable of being used for bare metal recovery and VM Instant boot for business continuity
- Follow the steps in Cloud Backup to create a bare metal recovery capable cloud backup
2. Create and Deploy a Hyper-V capable Server in Azure
- Go to Microsoft Azure website https://azure.microsoft.com/ and follow the instructions to create an account if you don’t already have one.
- Once signed in, you will be presented with the Azure Portal
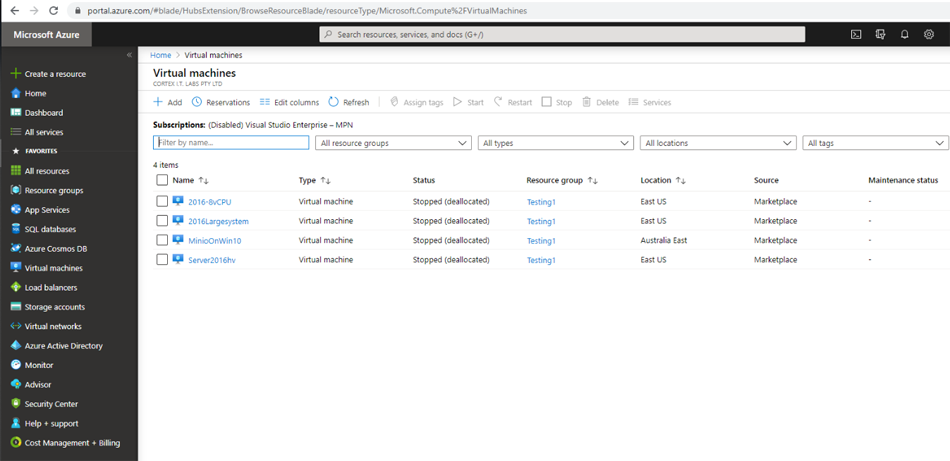
We will now guide you through the steps to create a Virtual Hyper-V server. - Select Virtual machines from the left menu.
- Select + Add from the top menu.
-
This will open the Create a virtual machine screen.
-
For most fields in the Basic section, you can use the information hint to configure according to your needs. However, the following fields need to be configured as follows:
-
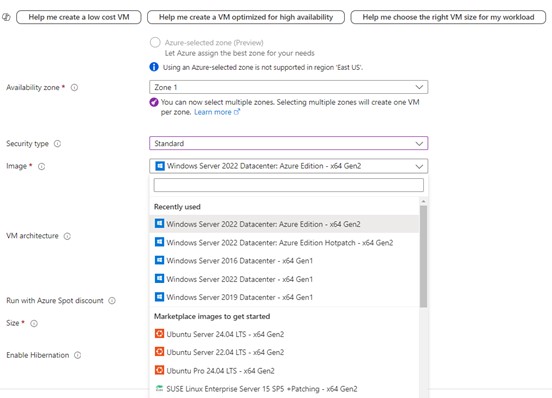
Ensure Security type is set to “Standard”
-
For Image select either a Windows Server 2022 or Server 2019 image.
- For Size, you must select a system that supports Nested Virtualization. Any of the D-Series and E-Series v3 and later would work. We recommend you choose a size with generous amount of RAM (e.g. 32GB), and at least 8 vCPUs.
The size and configuration of the virtual machine will affect not just the performance of the recovered system, but also the speed at which the backup will be downloaded to the virtual cloud server.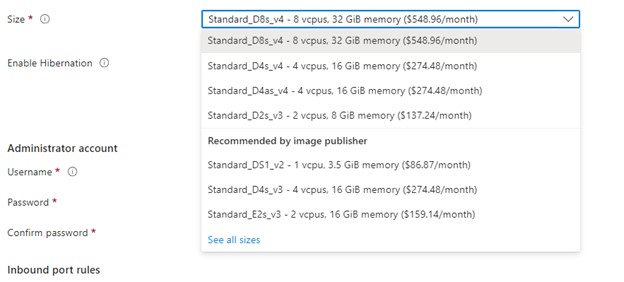
-
-
Ensure to save the Administrator username and password so that you can RDP to the VM.
-
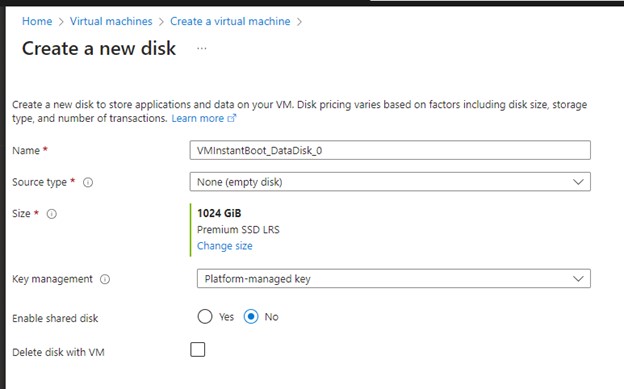
Follow to the next step Disks, select “Create and attach a new disk” to create an additional (empty) disk with disk size that is large enough to fit the all disk images of the system you are recovering.

-
Continue to the next steps. If unsure about any of the fields, leave as the default.
-
When ready, select Review & Create
-
Confirm all your configurations and select Create. This will deploy the Virtual server that you will configure as a Virtual Hyper-V server.
-
Click Go to resource, and in the Overview page of the VM resource, copy the Public IP address
-
Use this IP Address to run Remote Desktop connection to the newly created virtual server, and use the username/password that were created for this system.
3. Configure the virtual server as a virtual Hyper-V server
Install the Hyper-V role
- Log in to the new cloud VM. If the virtual disk you added hasn’t been initialized - e.g. not showing up in file explorer:
- Open Disk Management”
- Initialize the disk and take note of the drive letter – this is where you will download your backup to and where VM instant boot will create your bootable virtual disks.
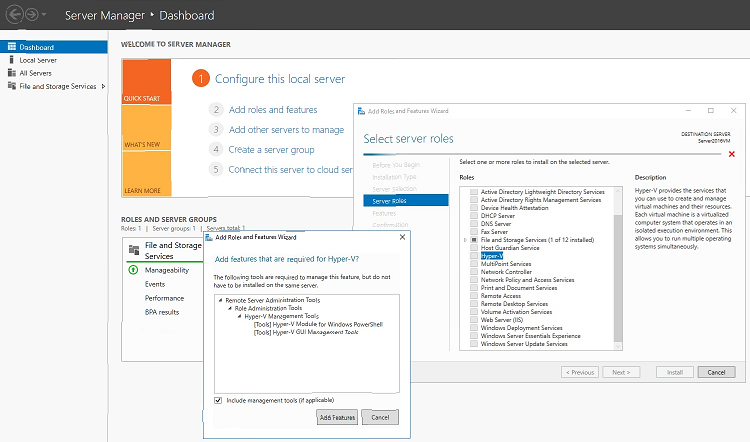
- Install Hyper-V role using the Server Manager
- Select Add Roles and Features
- Under Installation Type, select Role-based or feature-based installation
- Under Server Roles, select the Hyper-V check box
- Leave the Virtual Switch step as default as this will be created when we create the nested Hyper-V virtual machine
- When Installed, the system will need to be rebooted
4. Install BackupAssist Classic and Download the Backup
- Download and Install BackupAssist Classic v14 or later - by following BackupAssist Classic installation & migration.
- Once installed, Open the BackupAssist Classic console
- Under the System tab, select Download BMR backup
- At the bottom of the screen, select Discover backups from another machine to search for the cloud backup that you want to download
- Select the Cloud + icon to the top right of the box.
- In the new dialog, enter the details of the cloud container where the backup is located
- Once this is completed, you will be returned back to the Download BMR backup view with the available backups listed for your selection.
- Select the backup you want to download and follow the steps to download the backup to the empty virtual disk created ealier.
NOTE: The backup can take some time to download (depending on the size of the backup, the network bandwidth and size of the Azure VM system you chose).
5. Run VM Instant boot and launch VM
Once your virtual Hyper-V server is configured in Azure and you have downloaded the backup, follow the steps in the VM Instant Boot guide, starting at Step 2. These steps explain how to make the backup bootable, create a VM in the Hyper-V Host, and boot that VM using the bootable backup.