Fast and secure drive imaging technology optimized for full system recovery and immediate business continuity for both Physical and Virtual environment. Supports local, removable, network and cloud destinations.
Advanced System Protection Datasheet
How to create an System and Volume backup job
Launch BackupAssist and follow the steps outlined below:
- Under the JOBS navigation menu, select Create new tab.
- Select System and Volume Backup.
- Selections.
Select the volumes and applications you want to back up. VSS applications will be displayed as application directory containers. Individual files cannot be selected to ensure the backups have full file restore and system recovery functionality. - Destination media.
Select the media you want to back up to. This step’s name will change to the media type selected when you click Next.
You can select from Removable media, Local media, Local network and Cloud. To learn more about the different Cloud storage providers, see Cloud Backup. - Select a media for your backup destination.
- Click Next.
- Schedule
This step is used to select when (days and times of the week) and how you want the backup job to run. A selection of pre-configured schedules, called schemes can be selected. Select the desired backup scheme and review the options available. - Set up destination.
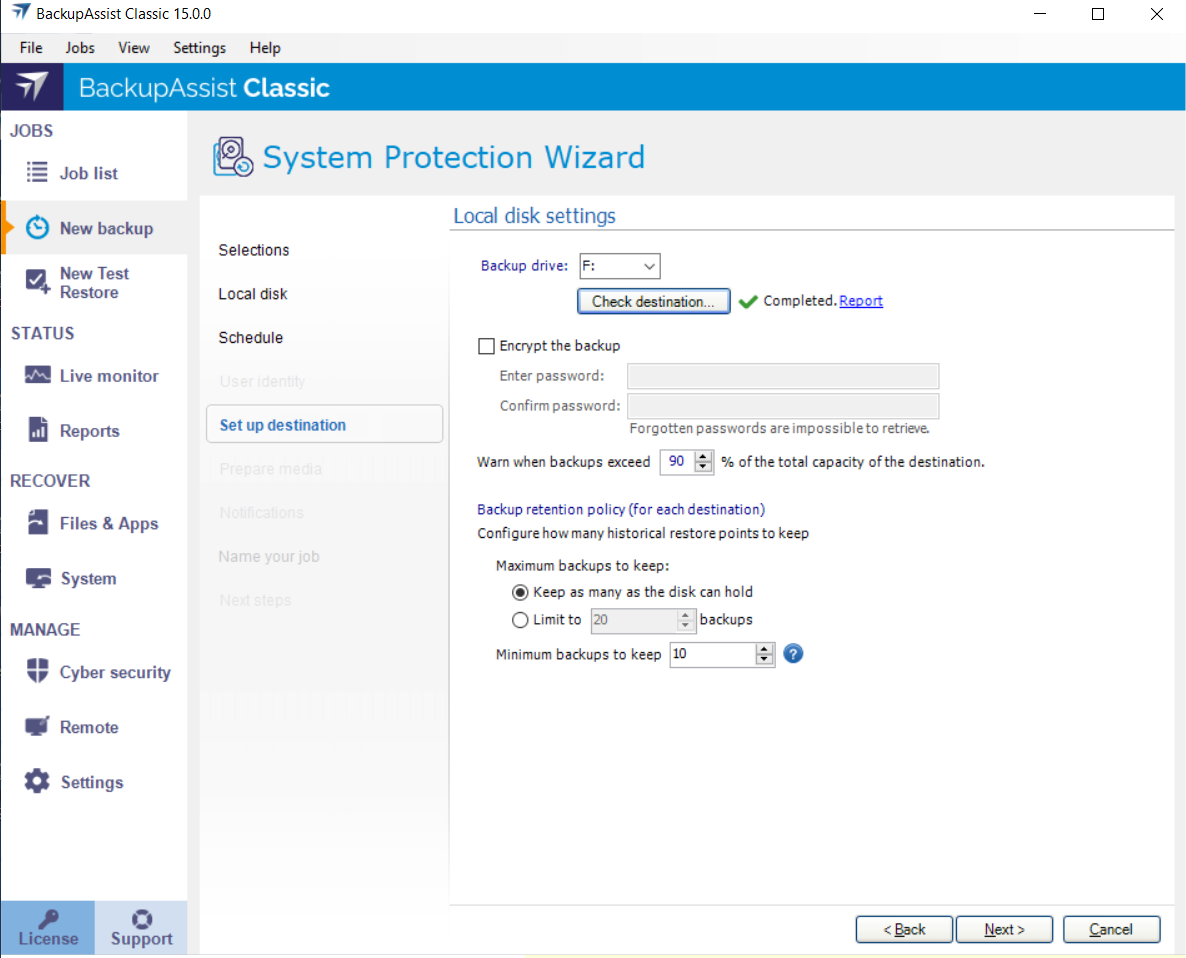
Configure the options for the destination selected in step 3. - Select the Backup media or configure the details of the network or cloud destinations..
- You may choose to Encrypt the backup (for Cloud destination, it is required). Provide a password and keep it safe as it will be required when restoring or recovering data.
- Once encryption is enabled, it cannot be changed.
- Under Backup retention policy, choose how many backups or how many days of backups to keep (depending on the destination type).
- Notifications
Once a backup job has completed, BackupAssist can send an email to inform selected recipients of the result. This email notification is enabled during the creation of the backup job, but you must also provide your mail server settings so that the notifications can be sent. To learn how to configure your mail server for BackupAssist, see Email server settings. Show more
To enable email notifications:
- Select Add an email report notification.
- Enter recipients into the Send reports to this email address field.
- Enter recipients into the Also send reports to this email address field. You can then use the drop down list to select the condition under which the email is sent.
- If you want to know when a backup media has been changed, select Add an email reminder notification and enter the email addresses to send the notifications to.
- Click Next.
To learn more, see Edit Job : Notifications
Note: After the backup job has been created, you can modify the notification's recipients, set additional notification conditions and include print and file notification types. To learn more, see Email address list
- Prepare media
This step will allow you to prepare removable media (External disk destination selection) and label it. If you are not using external drives, we recommend Editing the backup job once you have created it and using the Prepare Media option to label each drive. - Let BackupAssist keep track of your media. Deselect this if you do not want to prepare and label your media.
- If the wrong media is inserted : Back up anyway and warn the users. This can be changed to Do not back up.
- If new or unrecognized media is inserted : Do not back up. This can be changed to Back up anyway and warn the users.
- Attach the removable drives. If you can only attach one media at a time, repeat the steps for each media.
- Change the label's description if you do not want to use the default description.
- Select the drive designation.
- Select Prepare.
- Name your backup.
Provide a name for your backup job, and click Finish.

Start by selecting from the following two options:
Back up for disaster recovery of your system (BMR).
This option will create an image of your system that can be used to perform a full recovery of your computer. Critical Volumes is selected by default and required for a bare-metal backup. A BMR capable backup can also be used for VM Instant Boot. You will not be able to deselect critical volumes and applications that are required for a full system recovery.
Back up without disaster recovery of your system (no BMR).
This option is used if you only want to create a backup of specific volumes and applications. The option will allow you to deselect Critical Volume’s and select specific VSS applications and drives.
Once selected, you will be presented with the list of volumes to select / deselect.
Full VSS mode and Copy VSS mode.
Full VSS mode is selected by default and means that VSS will clean up log files in the guest after the backup has been created. For example, the logs of an Exchange Server. If Copy VSS mode is selected, VSS will not perform a post backup cleanup and the size of logs will continue to grow and take up disk space.
Make your selections, and click Next.

Follow these steps to choose your options:

Backup destination
Destination check
If you are using a Local media or a Local network destination, a Check destinationbutton will be available to check your backup destination for problems. After the checks have been completed, the results can be viewed by selecting the Report link. If you are using Removable media destinations, these checks are performed when you select Prepare on the Prepare Media step.
If you are using a Cloud backup, follow the steps in Cloud Backup for more detail.
Configure your backup destination, and click Next.


These three selections are automatically selected on the Prepare media screen:
The drives listed are based on the backup schedule selected. Each drive will have a default label name based on your backup schedule, a drive designation drop-down and a Prepare button that is selectable when the media is attached.
To prepare the media:
The drives will be labeled and marked for encryption. Labeling the drive allows BackupAssist to check that it is being used on the correct day.
Destination check report
Once the prepare process has completed, a Report link will appear next to the Prepare button. This link opens the Destination Check report, which will advise if any problems were detected with the backup media. For System Protection backups, if the Make media bootable with RecoverAssist was selected in the Set up destination screen, the report will also advise if the media can or cannot be made bootable.
Once all of the media have been prepared, select Next.
Your System and Volume backup job has now been created.
What's next
- To learn about monitoring backup jobs, see Monitor backups
- To learn about the other backup settings available, see Settings tab
- To learn about the options available when you edit a backup job, see Jobs list